
Your first 10 minutes
New to Nila? This is the whole path — from an empty browser tab to an assistant that knows your inbox, your calendar and your files. Each step links to the deeper guide if you want the detail.
✅ The onboarding path
Find your way around
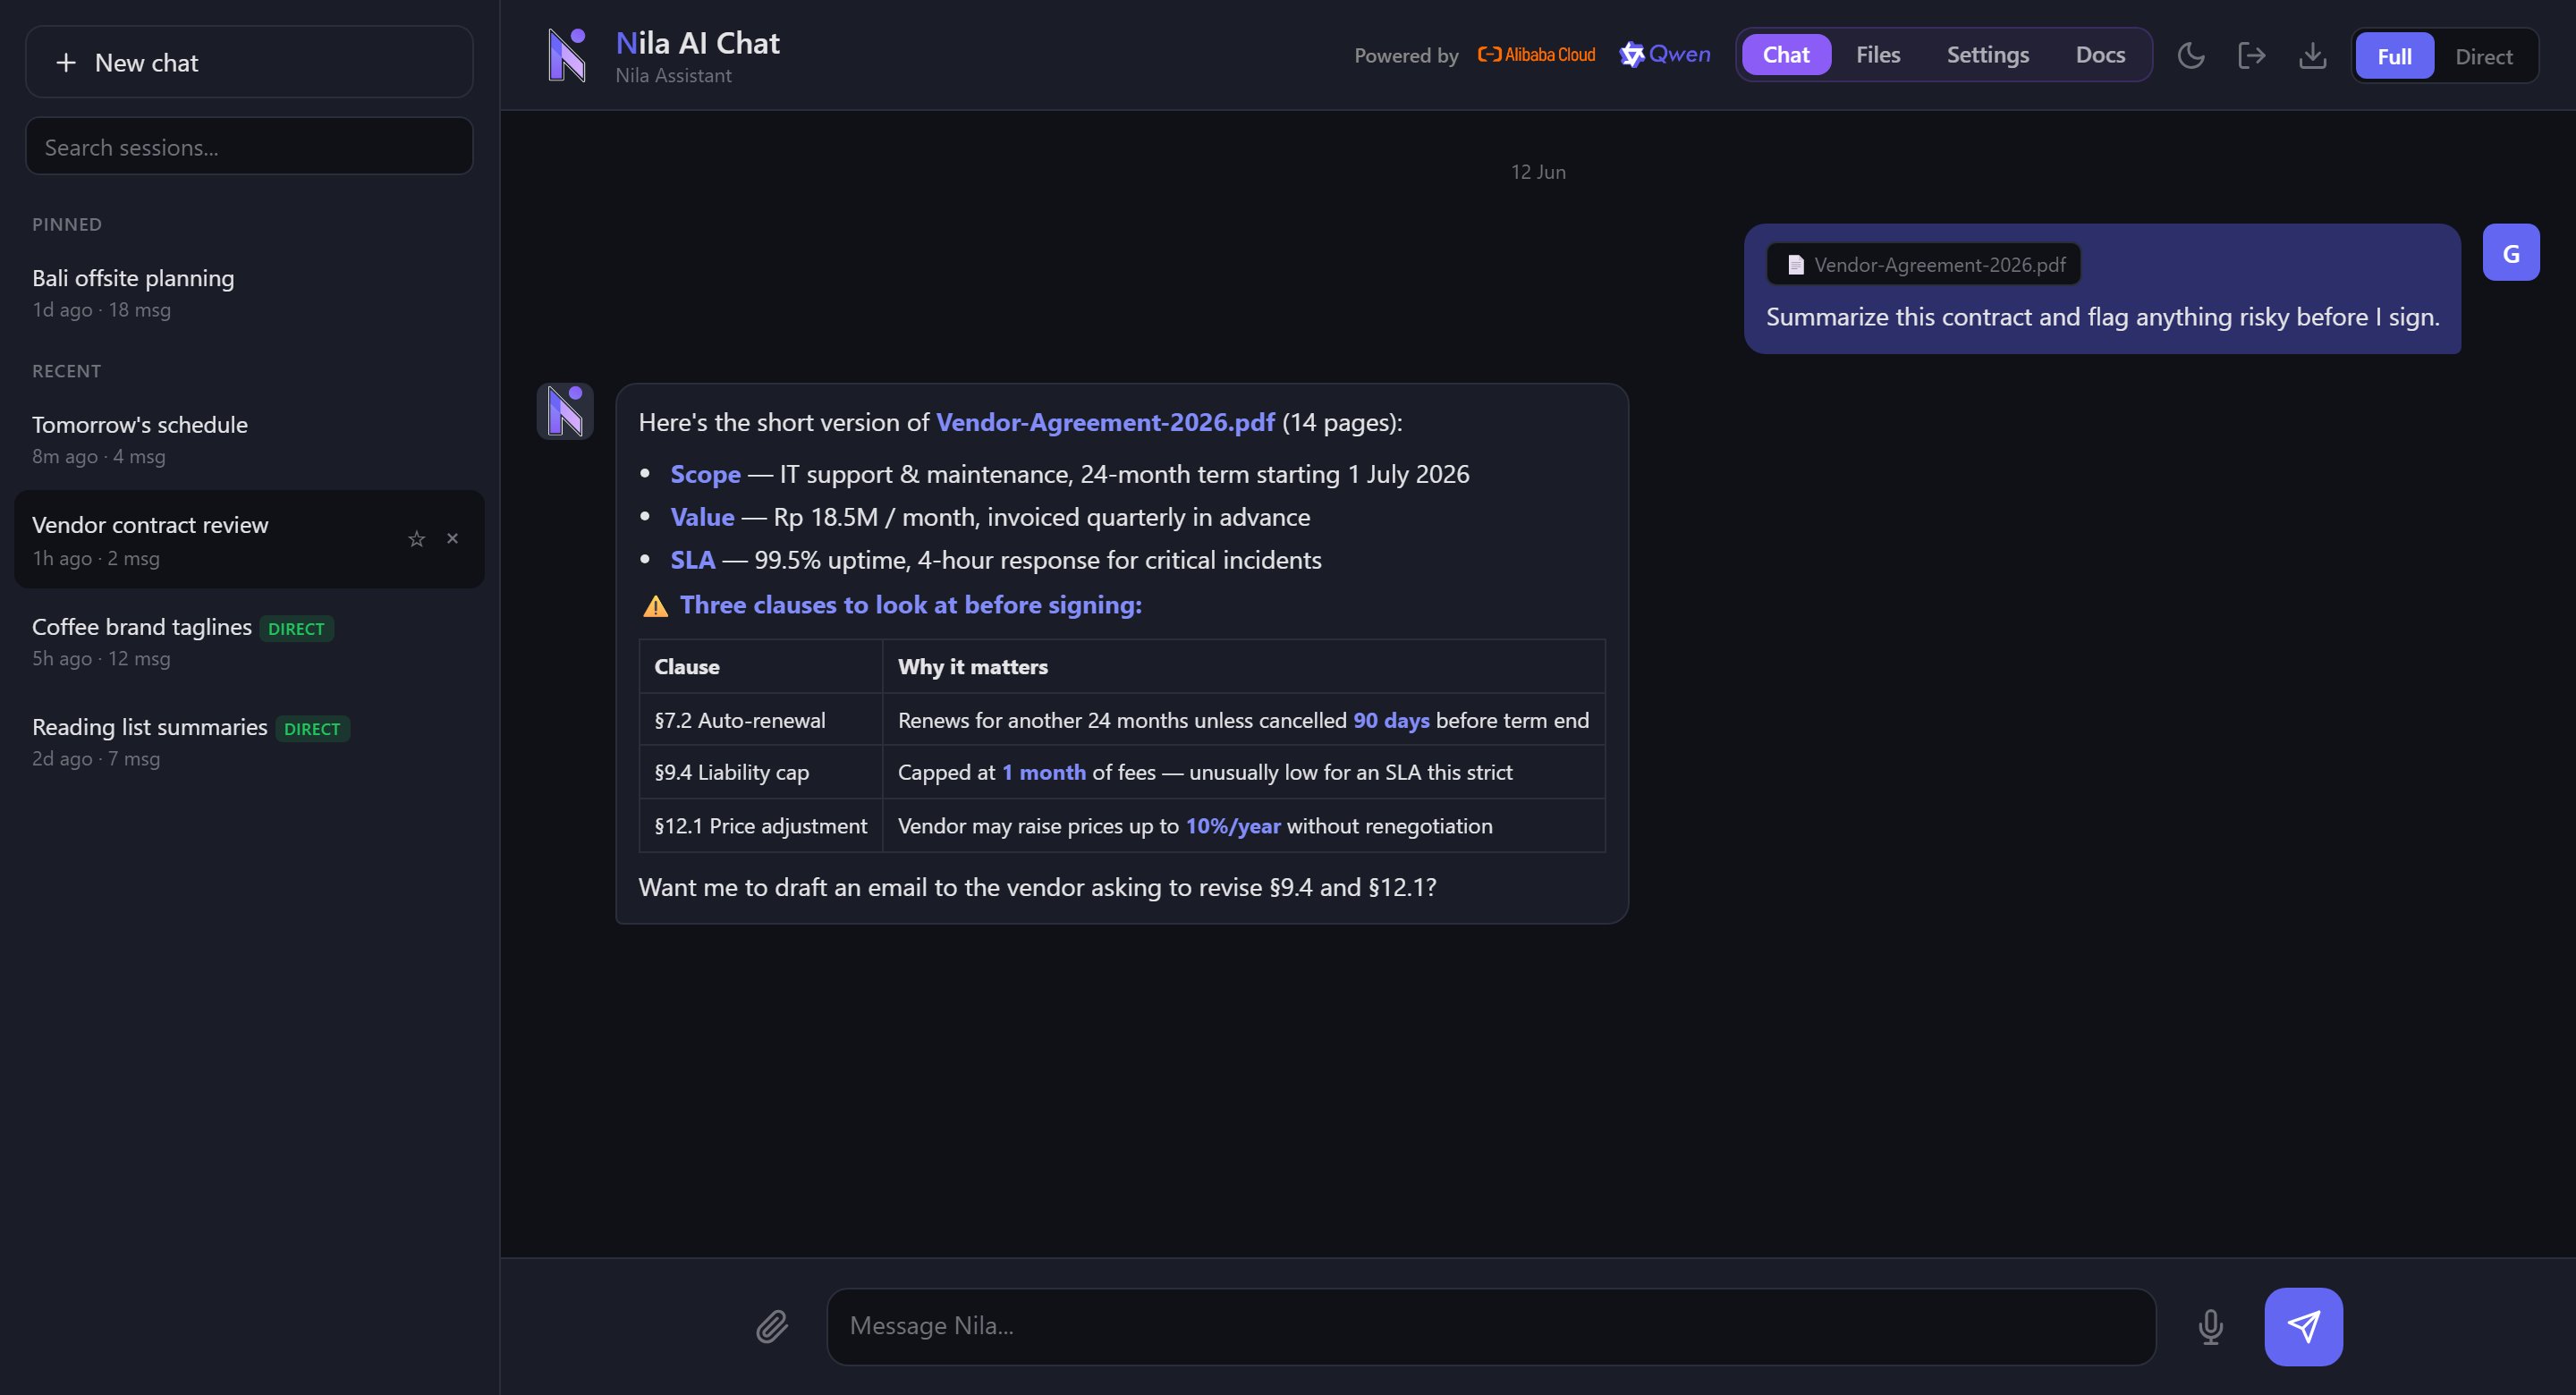
Nila is one assistant with three faces in the browser — plus Telegram on your phone. The navigation pill in every header switches between them.
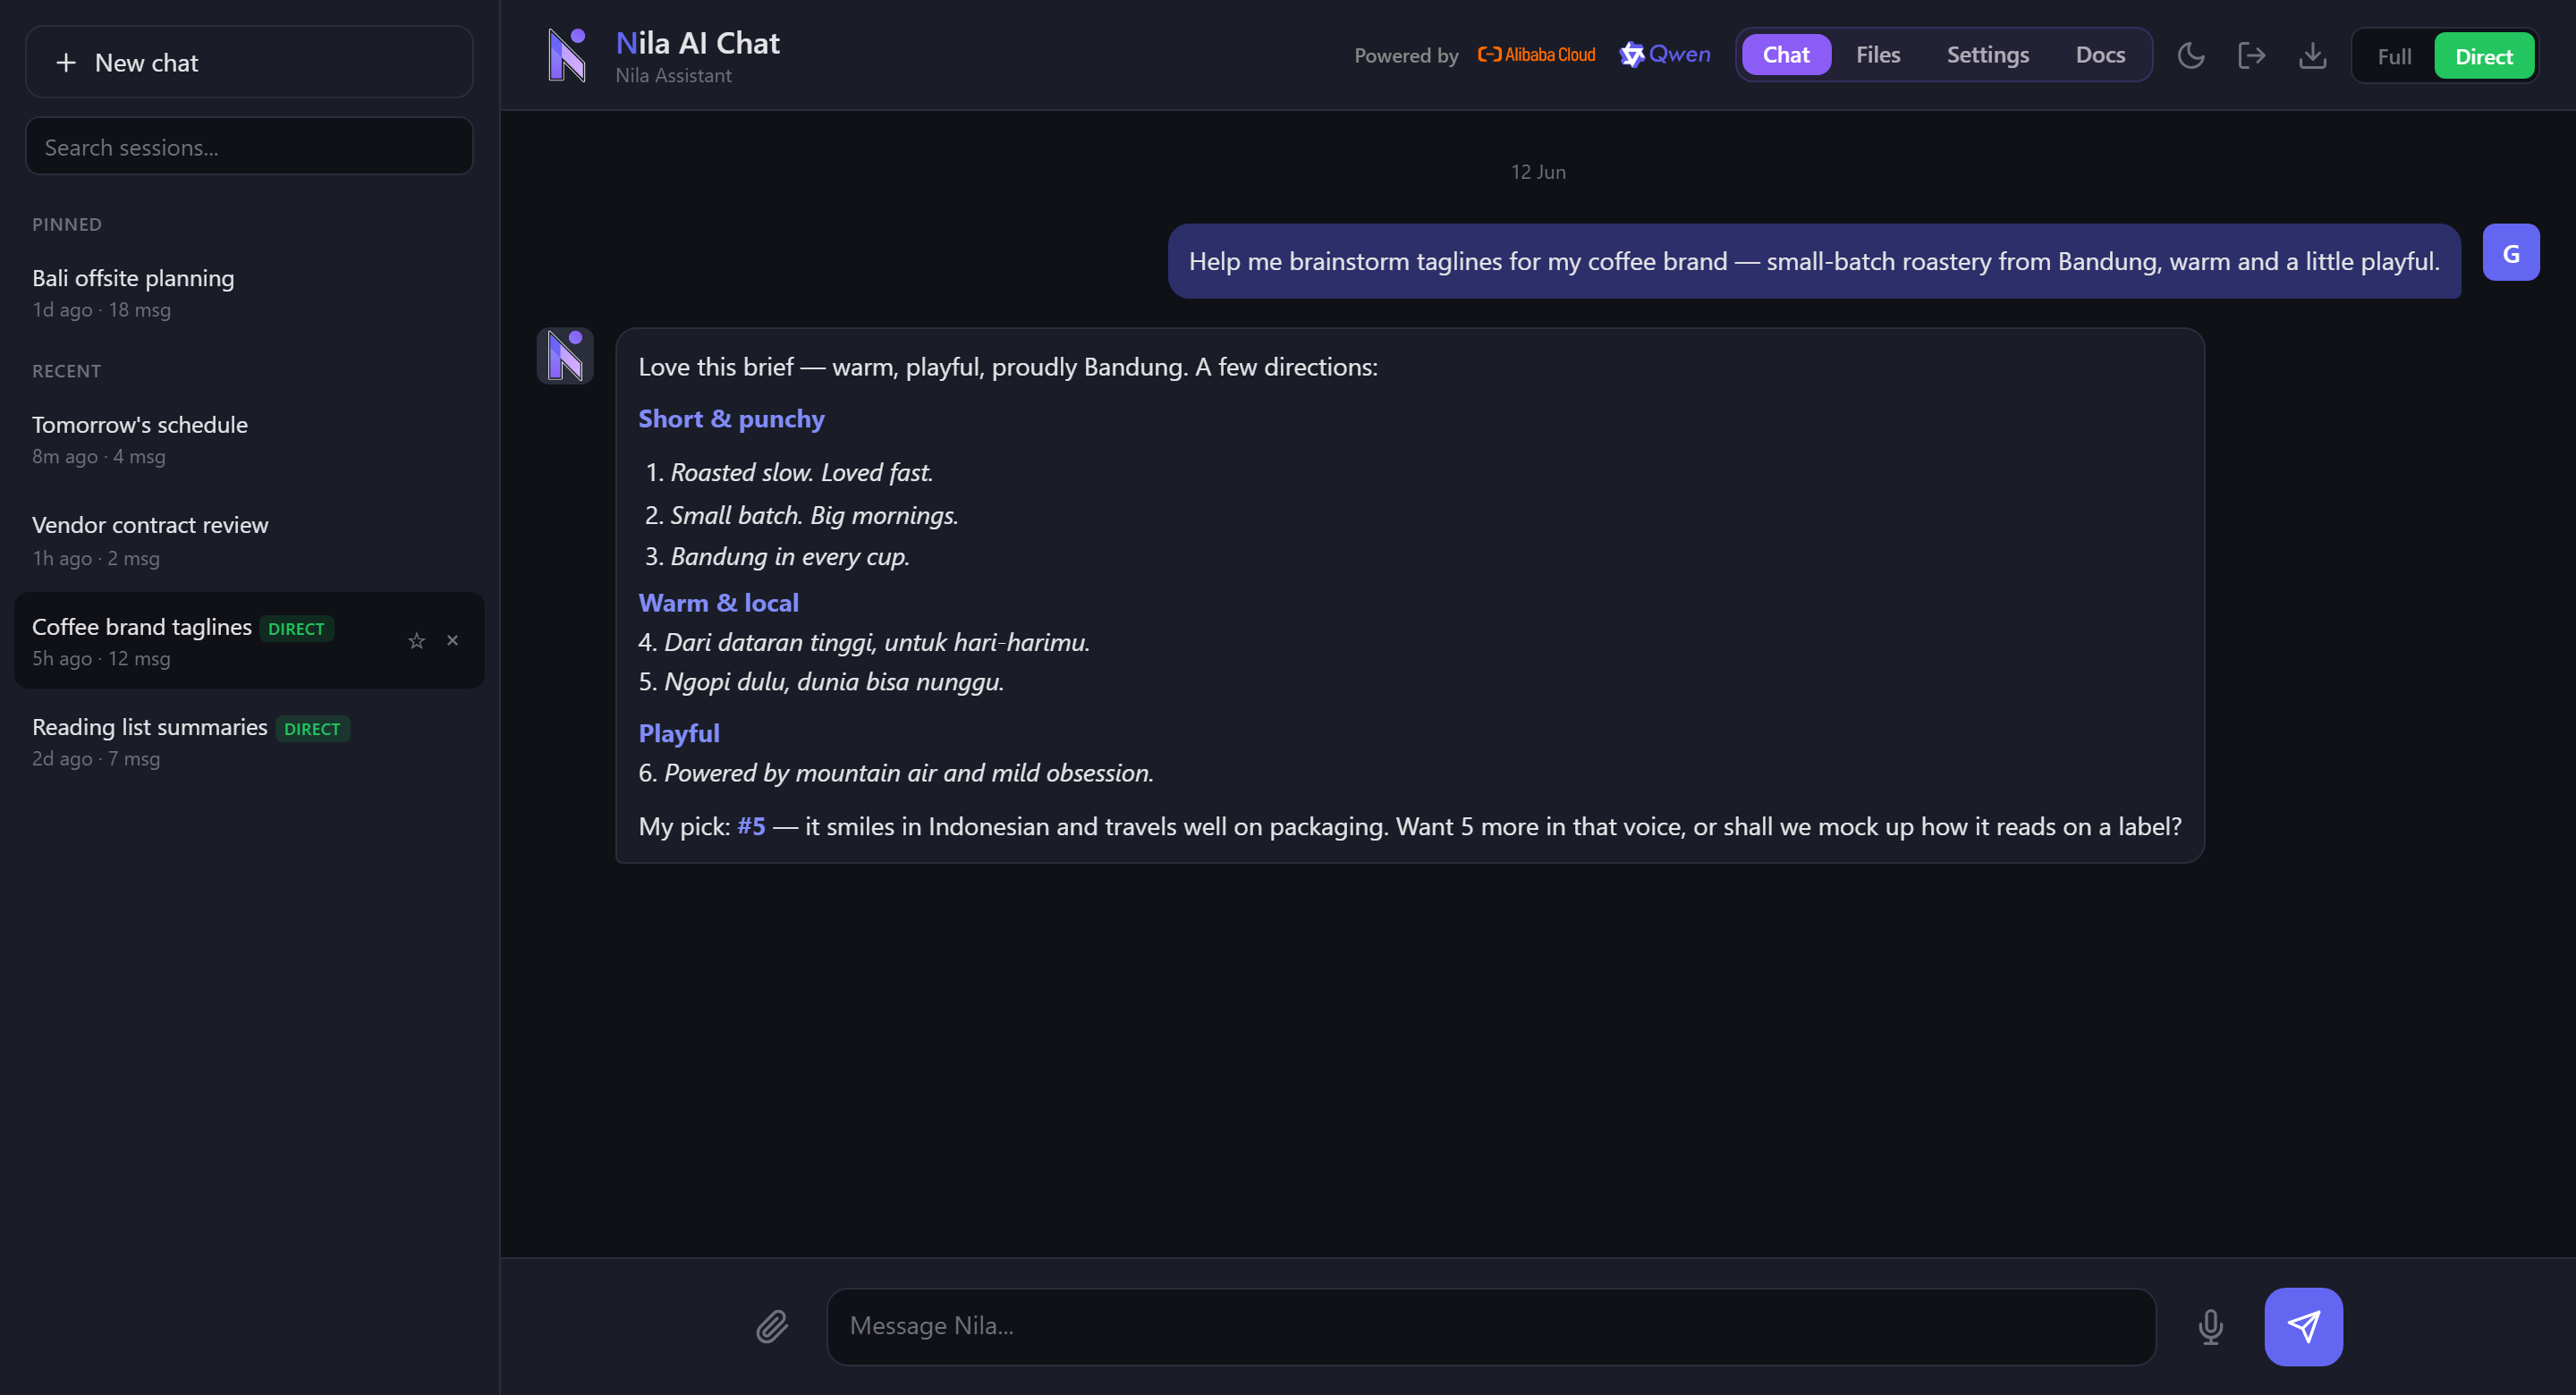
💬 Chat — /nila
Talk to your assistant in the browser. Same brain as the Telegram bot, with a full conversation workspace around it.
Nila on Telegram
The same assistant lives on Telegram. To link your account:
- In Telegram, search for
@nila_xq_botand tap Start - In Nila, open Settings → Connect Telegram — you'll get a one-time code
- Send the code to the bot:
/start <code>(or use the one-tap link button)
The code is valid for 15 minutes. Once linked, just message the bot — it's your Nila, with the same memory and conversations as the web app.
🎯 Full vs Direct — which mode when?
The toggle at the top right of Chat picks how much of Nila wakes up for that conversation. Think of it this way: Full is your assistant sitting at its desk with your calendar, inbox and to-do list open. Direct is the same brain on a walk with you — great conversation, but nothing to look things up in and no way to act.
| Full | Direct | |
|---|---|---|
| Looks at your real data calendar, email, tasks, contacts |
✅ Fetches it before answering | ❌ Knows nothing it can't see in the conversation |
| Takes actions send email, create events, set reminders, generate images |
✅ Proposes, then does it | ❌ Can only draft text for you to use |
| Long-term memory | ✅ Remembers facts you tell it across sessions | ❌ Only this conversation |
| Speed & cost | Slower — it checks things first | Fastest, cheapest |
| Best for | "Be my assistant" | Thinking, writing, learning |
The same message, two different outcomes
| You say | Full does | Direct does |
|---|---|---|
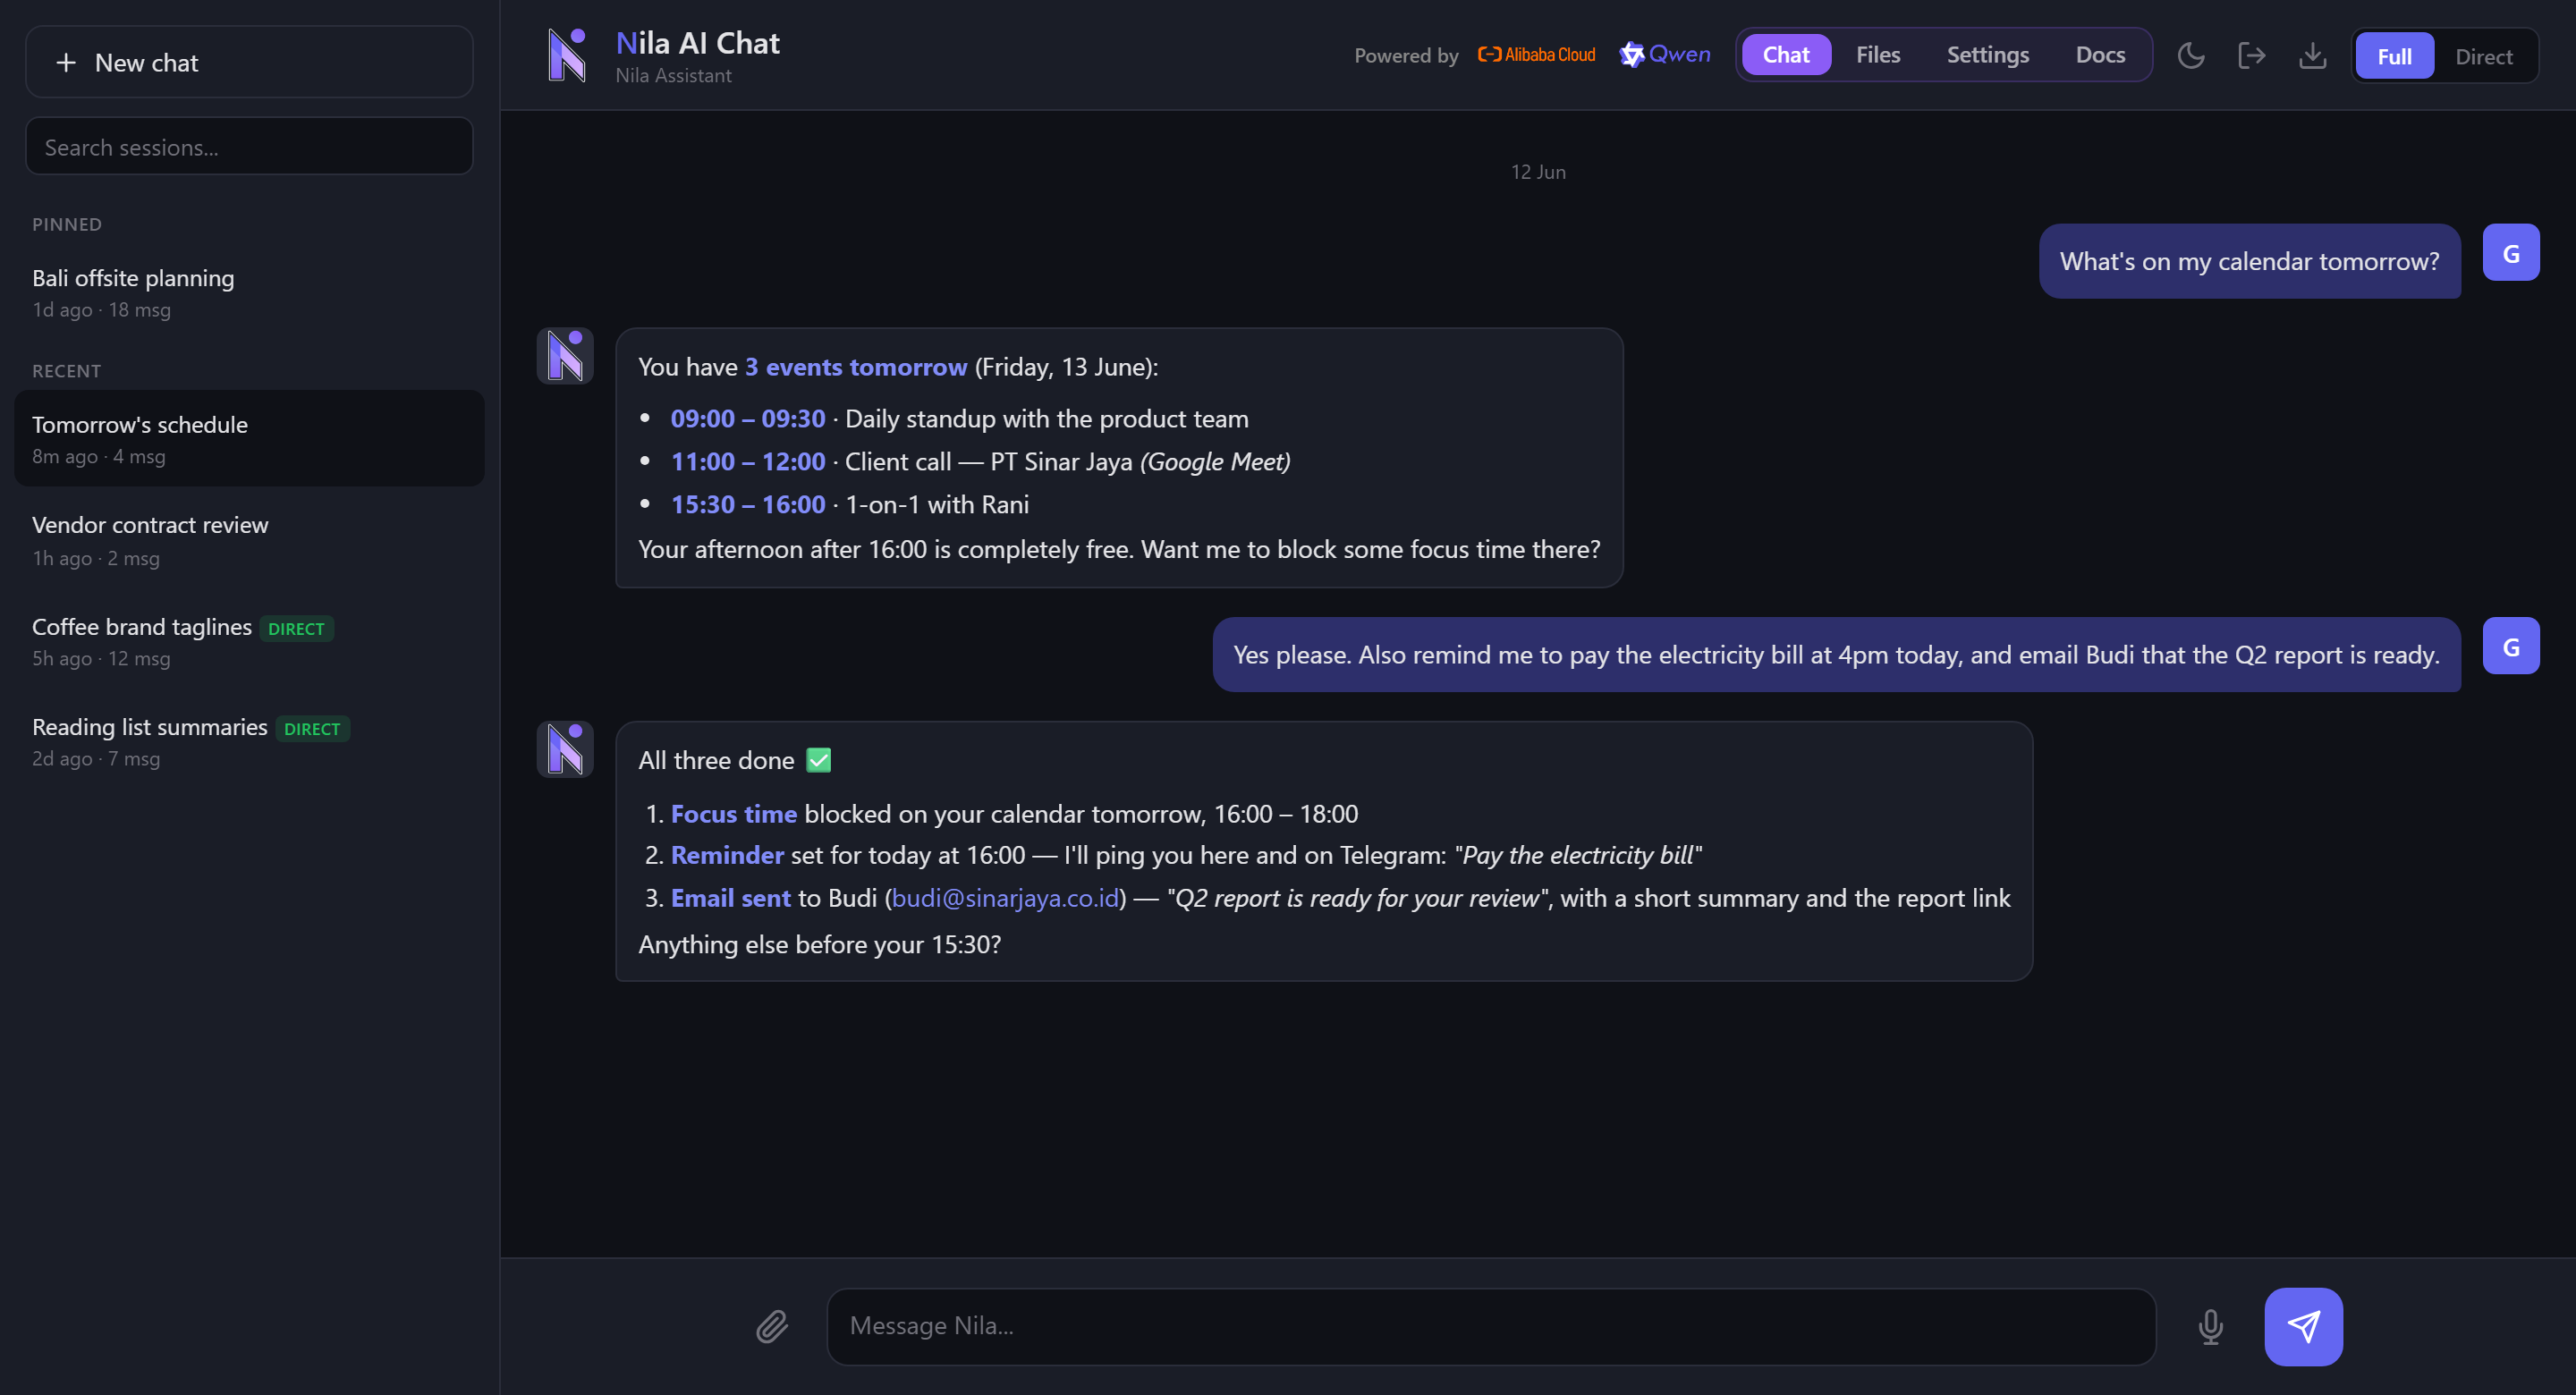
| "What's on my calendar tomorrow?" | Reads your actual calendar and lists tomorrow's meetings with times | Explains it can't see your calendar; asks you to paste it |
| "Email Budi that the report is ready" | Composes the email and sends it from your mailbox, then confirms | Writes a nice draft — you copy it into your email app yourself |
| "Ingatkan aku bayar BPJS jam 4 sore" | Schedules a real reminder that pings you on Telegram at 16:00 | Replies "oke!" — but nothing will actually remind you |
| "Help me brainstorm taglines for my coffee brand" | Works fine — but pays for data checks it didn't need | ⭐ The right tool: instant, focused, cheaper |
📁 Files — /files
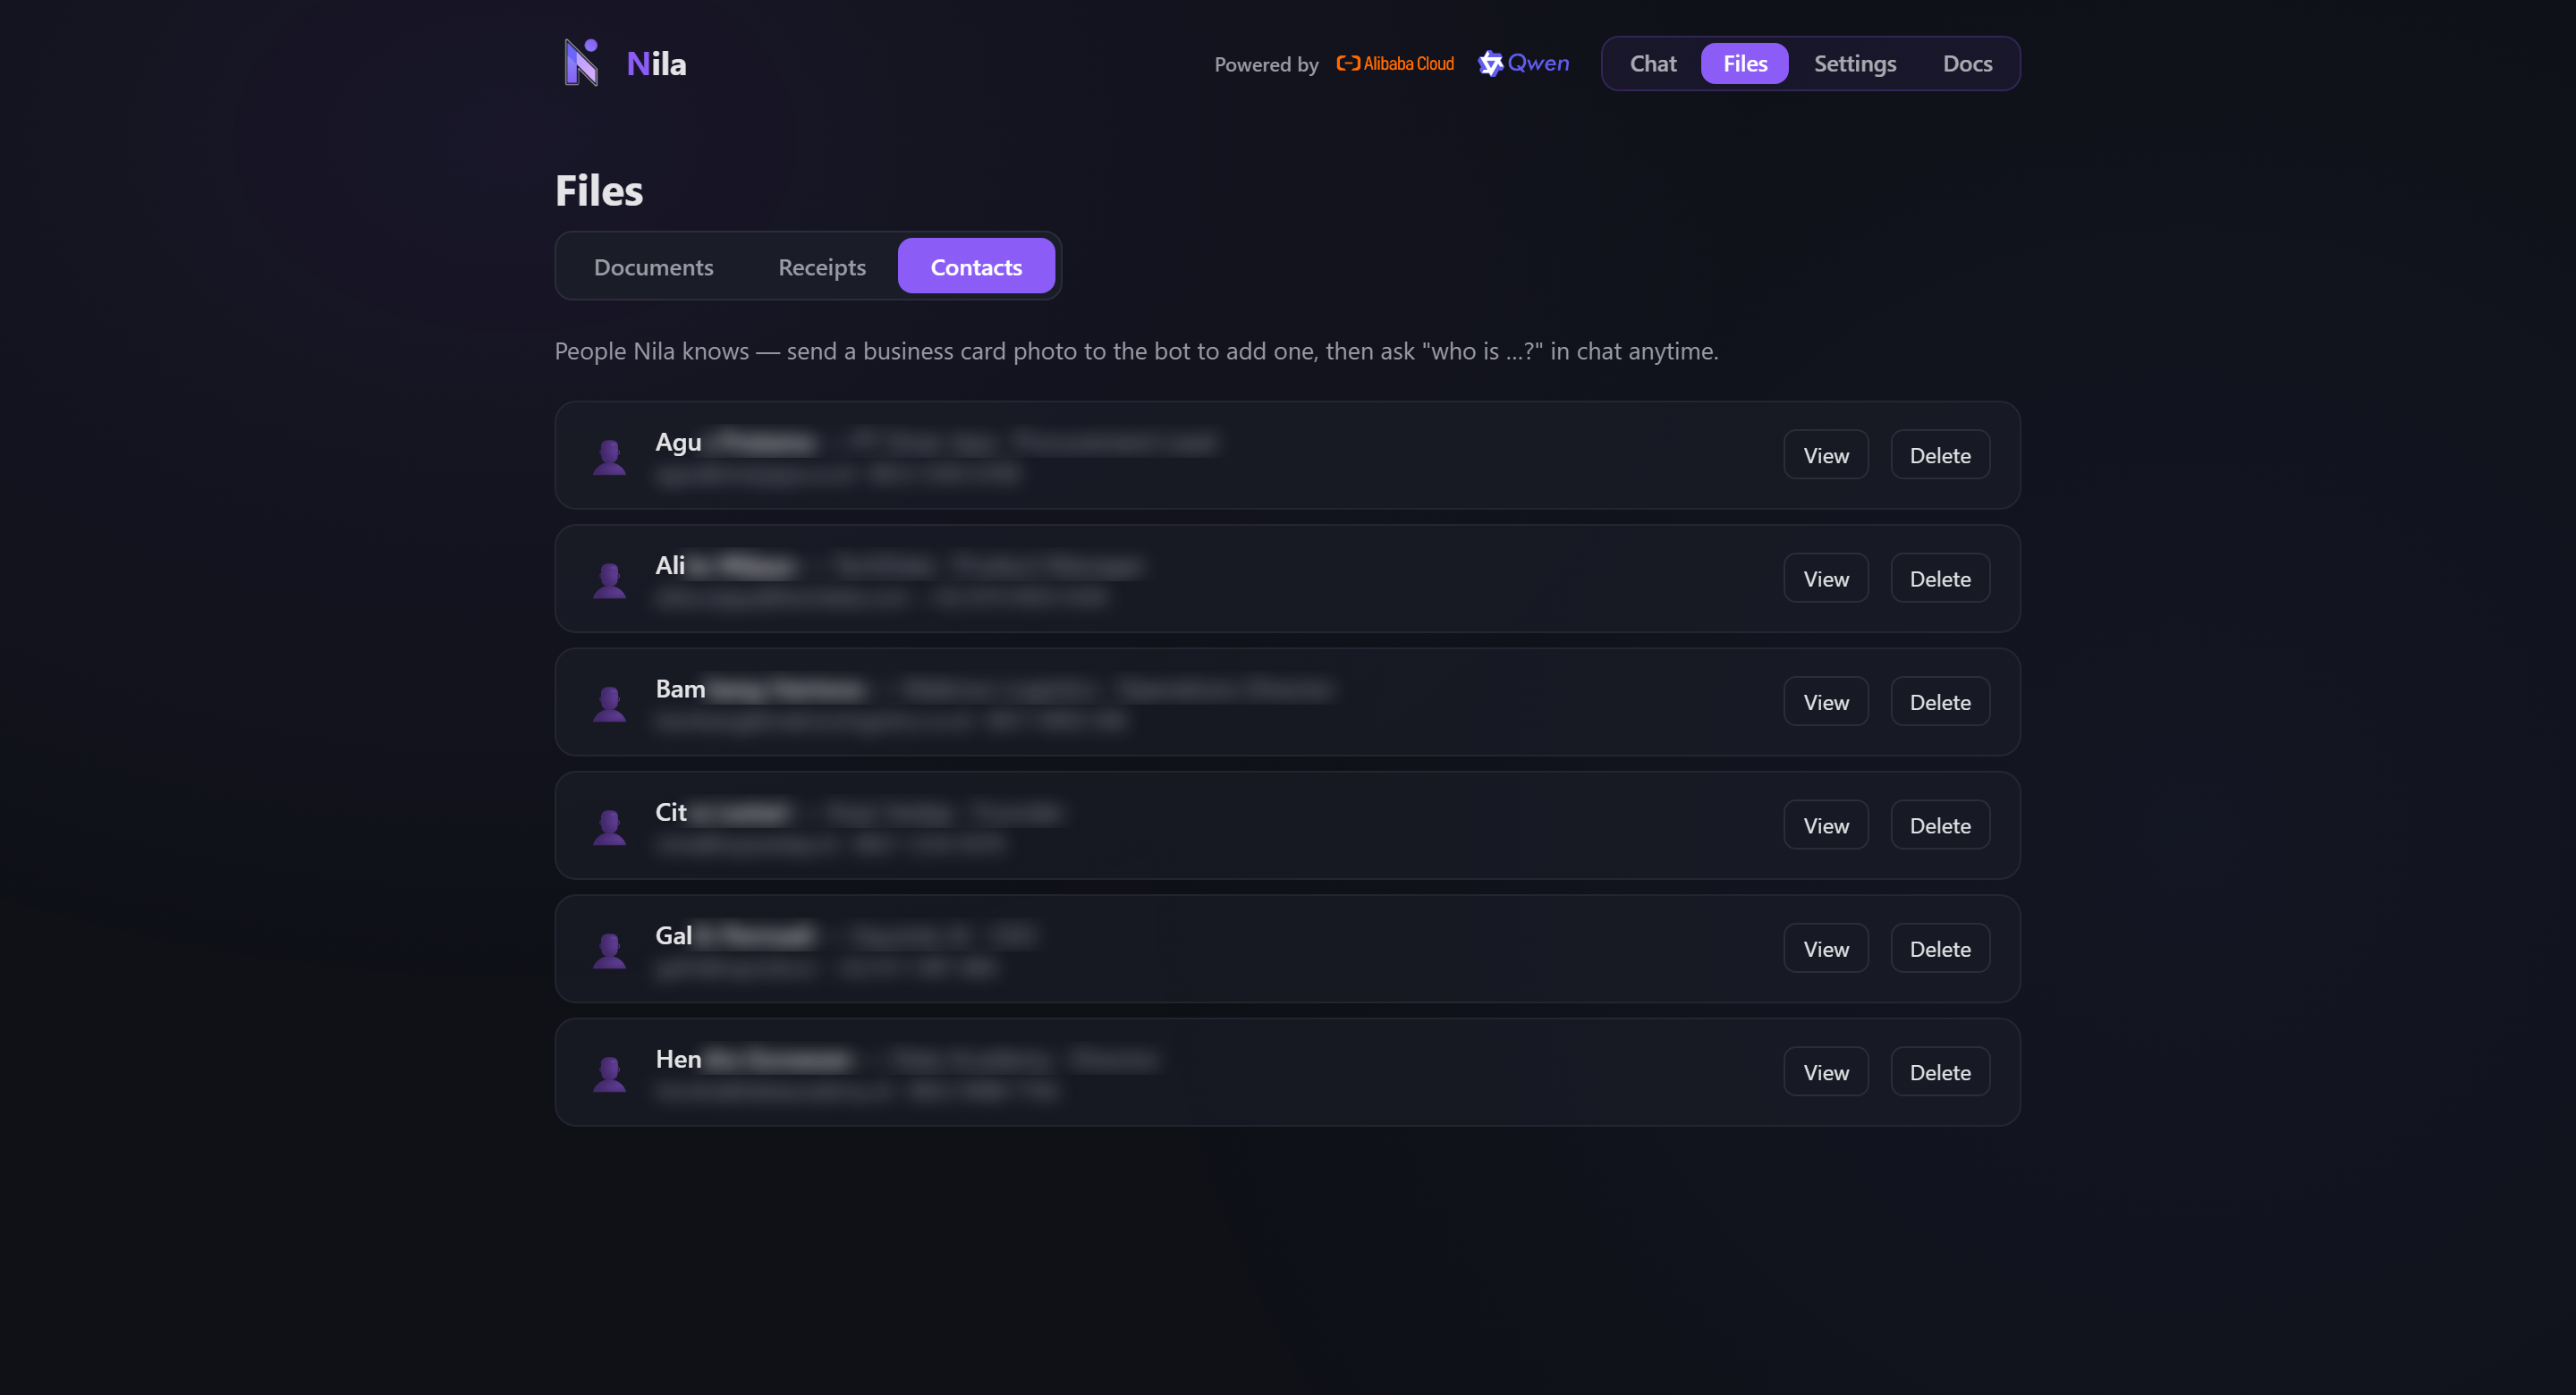
Your assistant's file home — everything it can search, ground answers in, or has filed for you lives here.
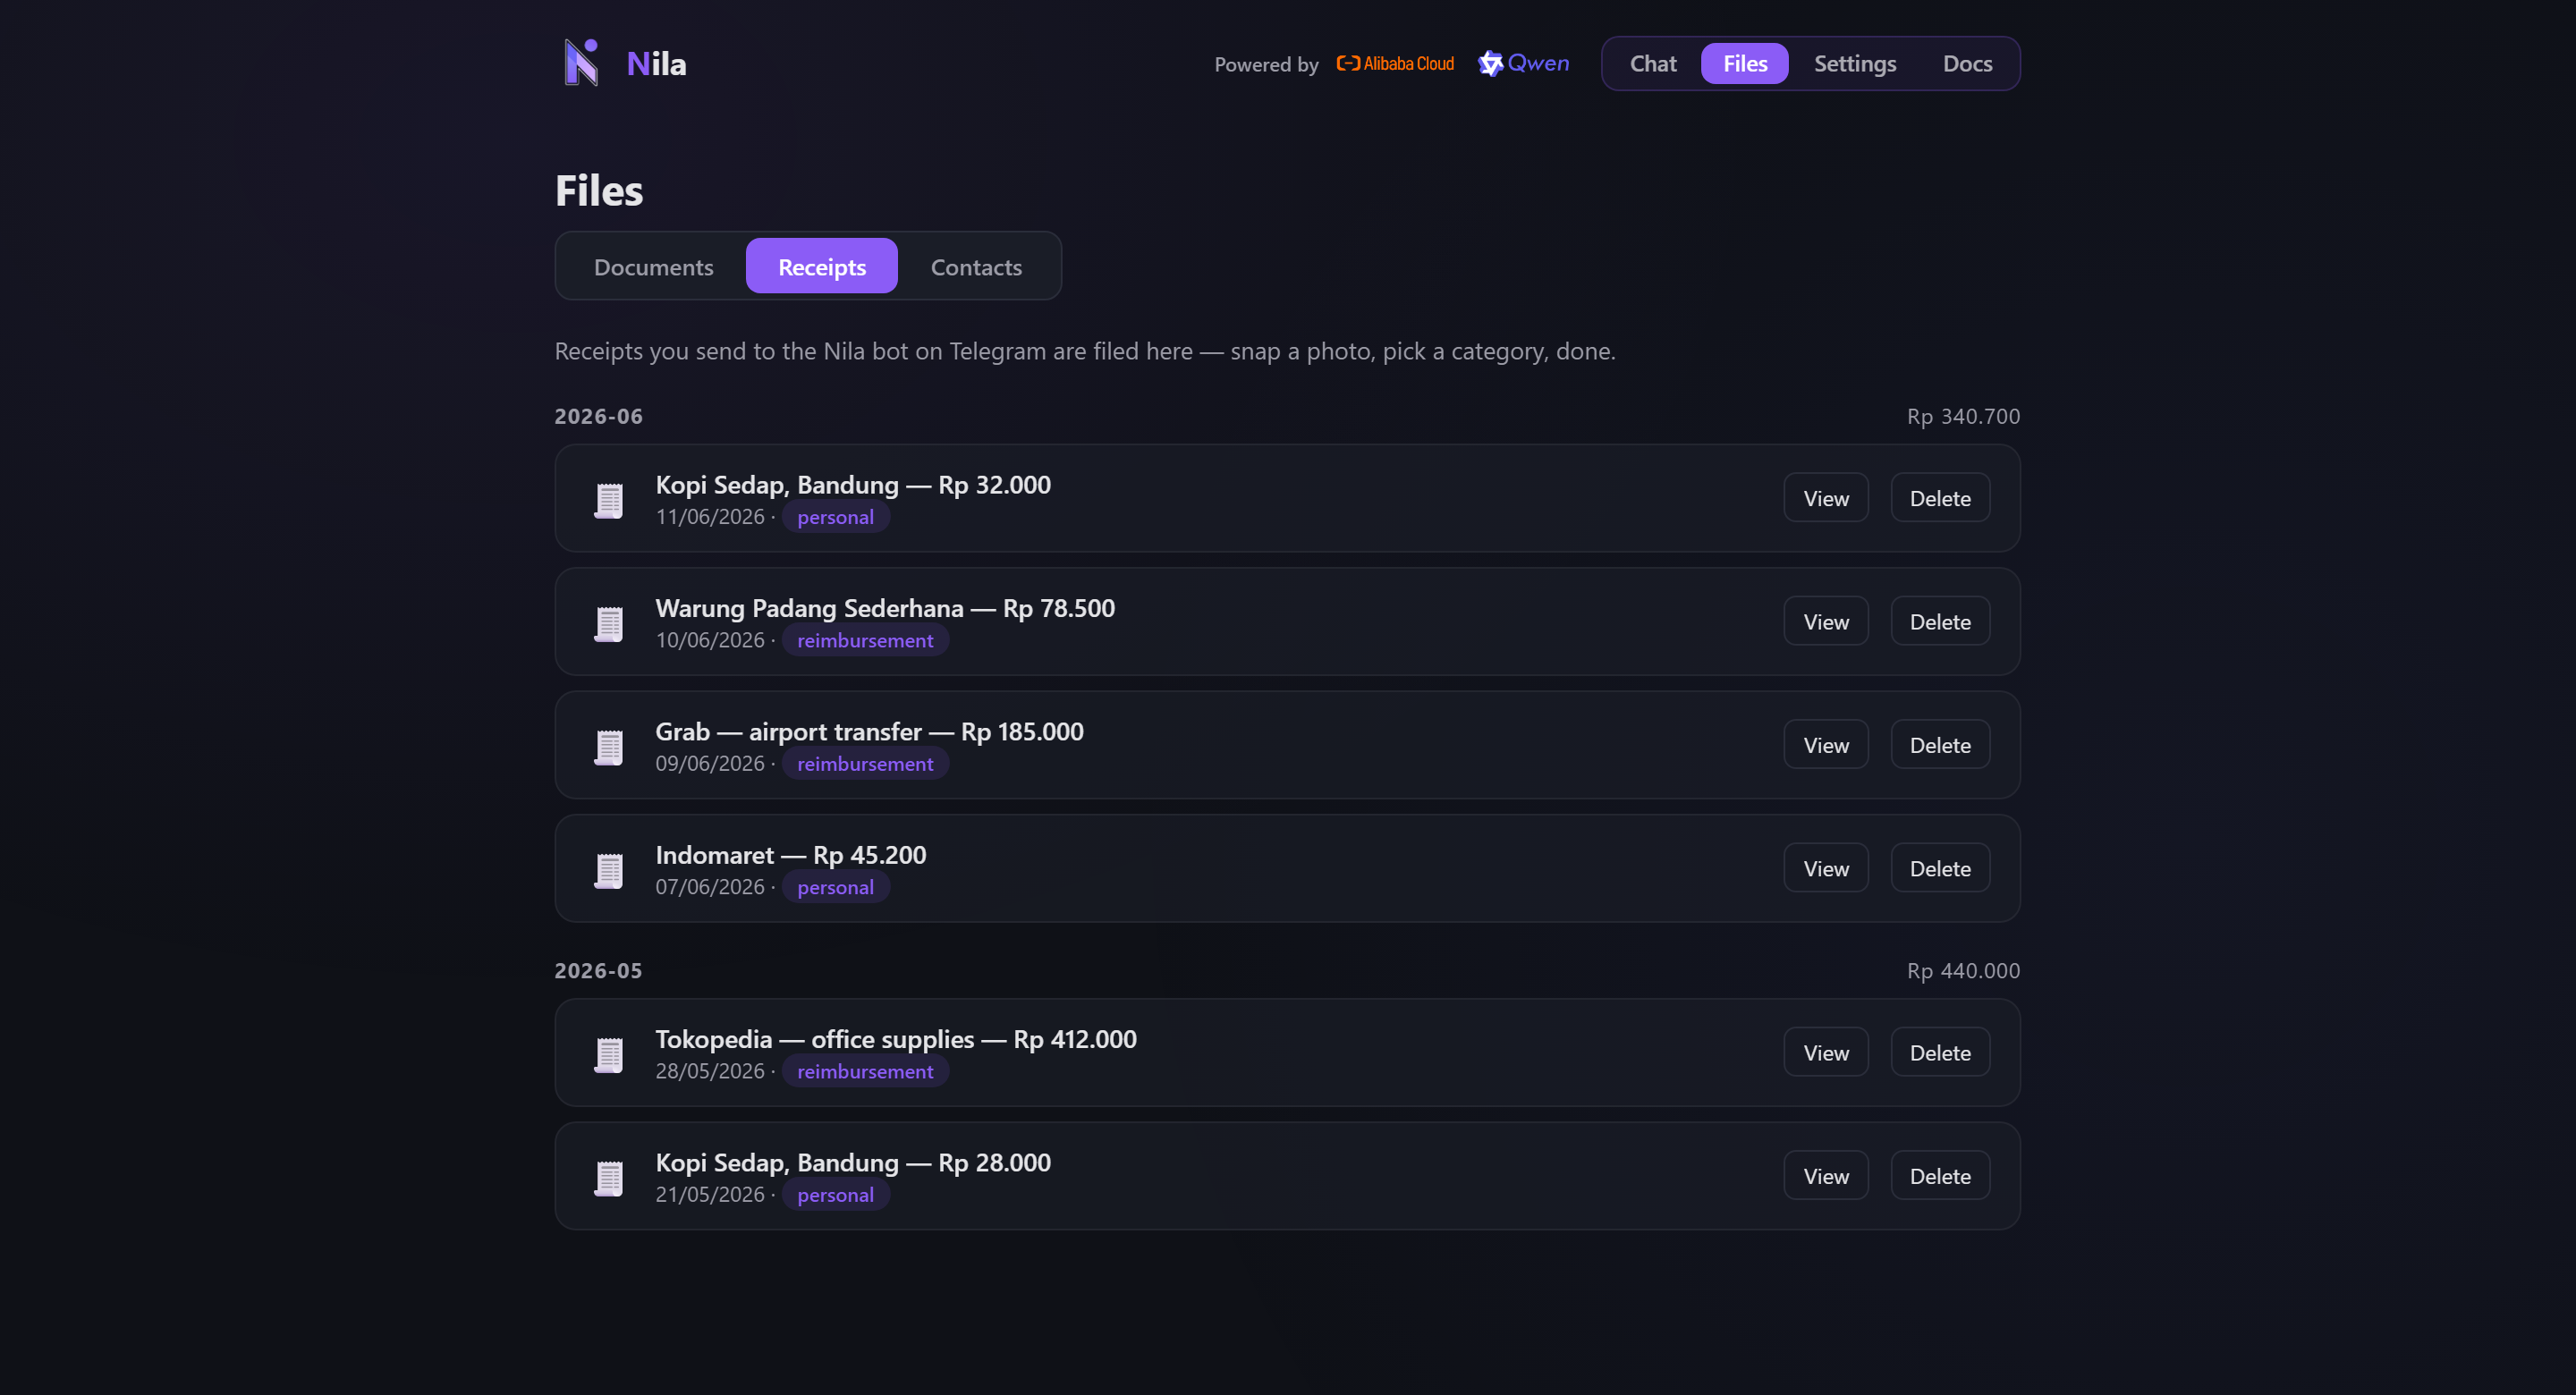
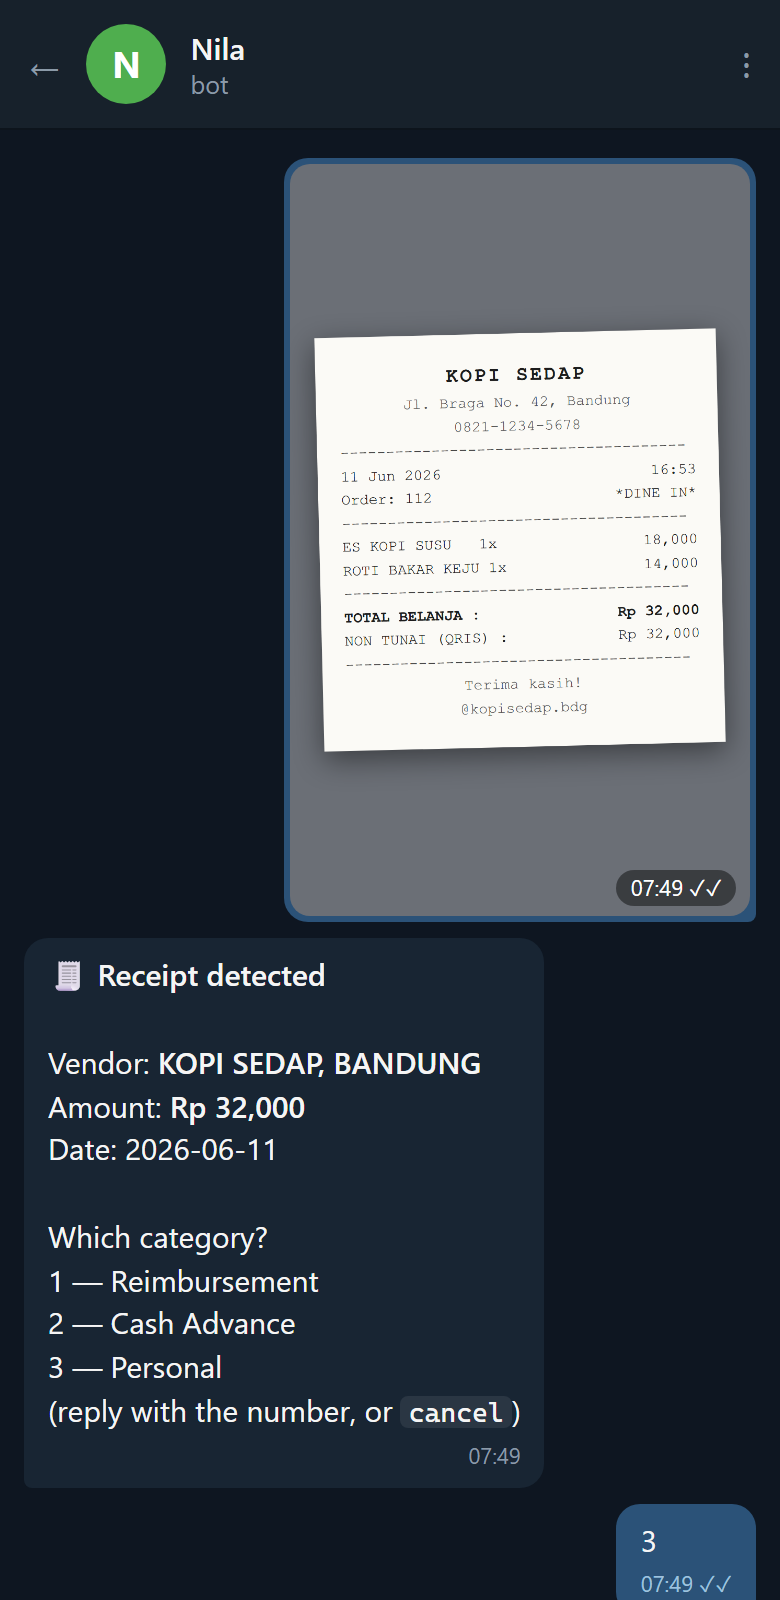
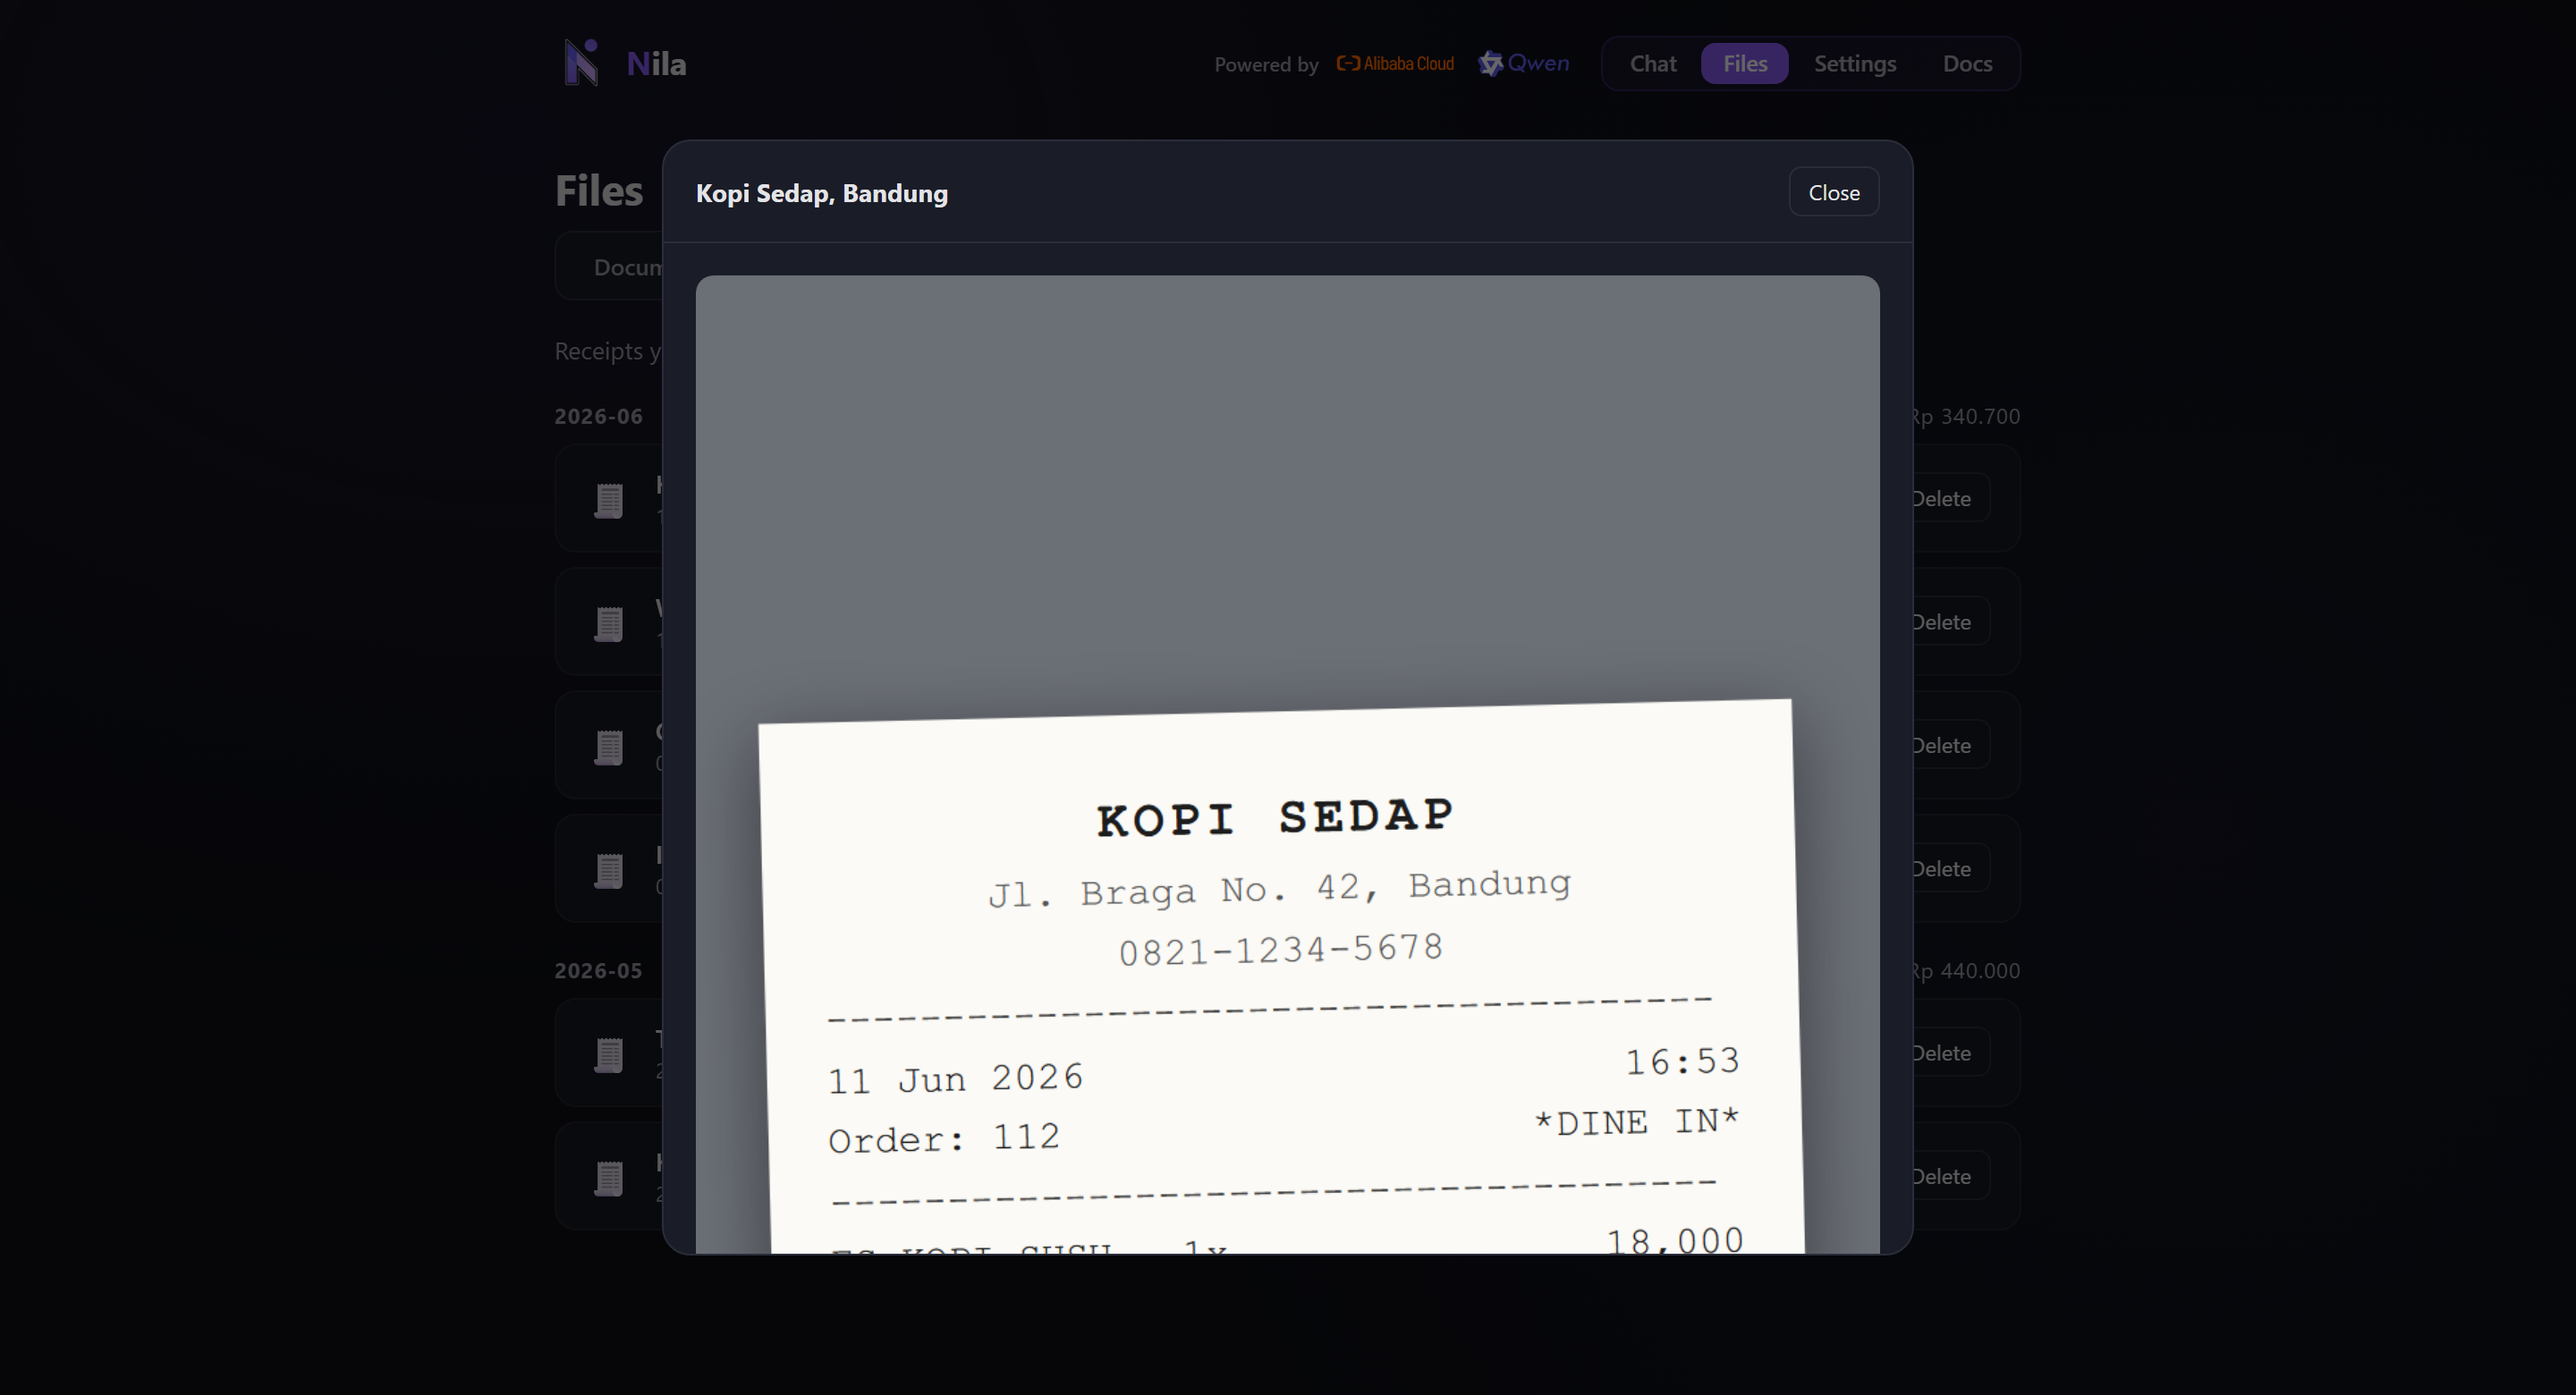
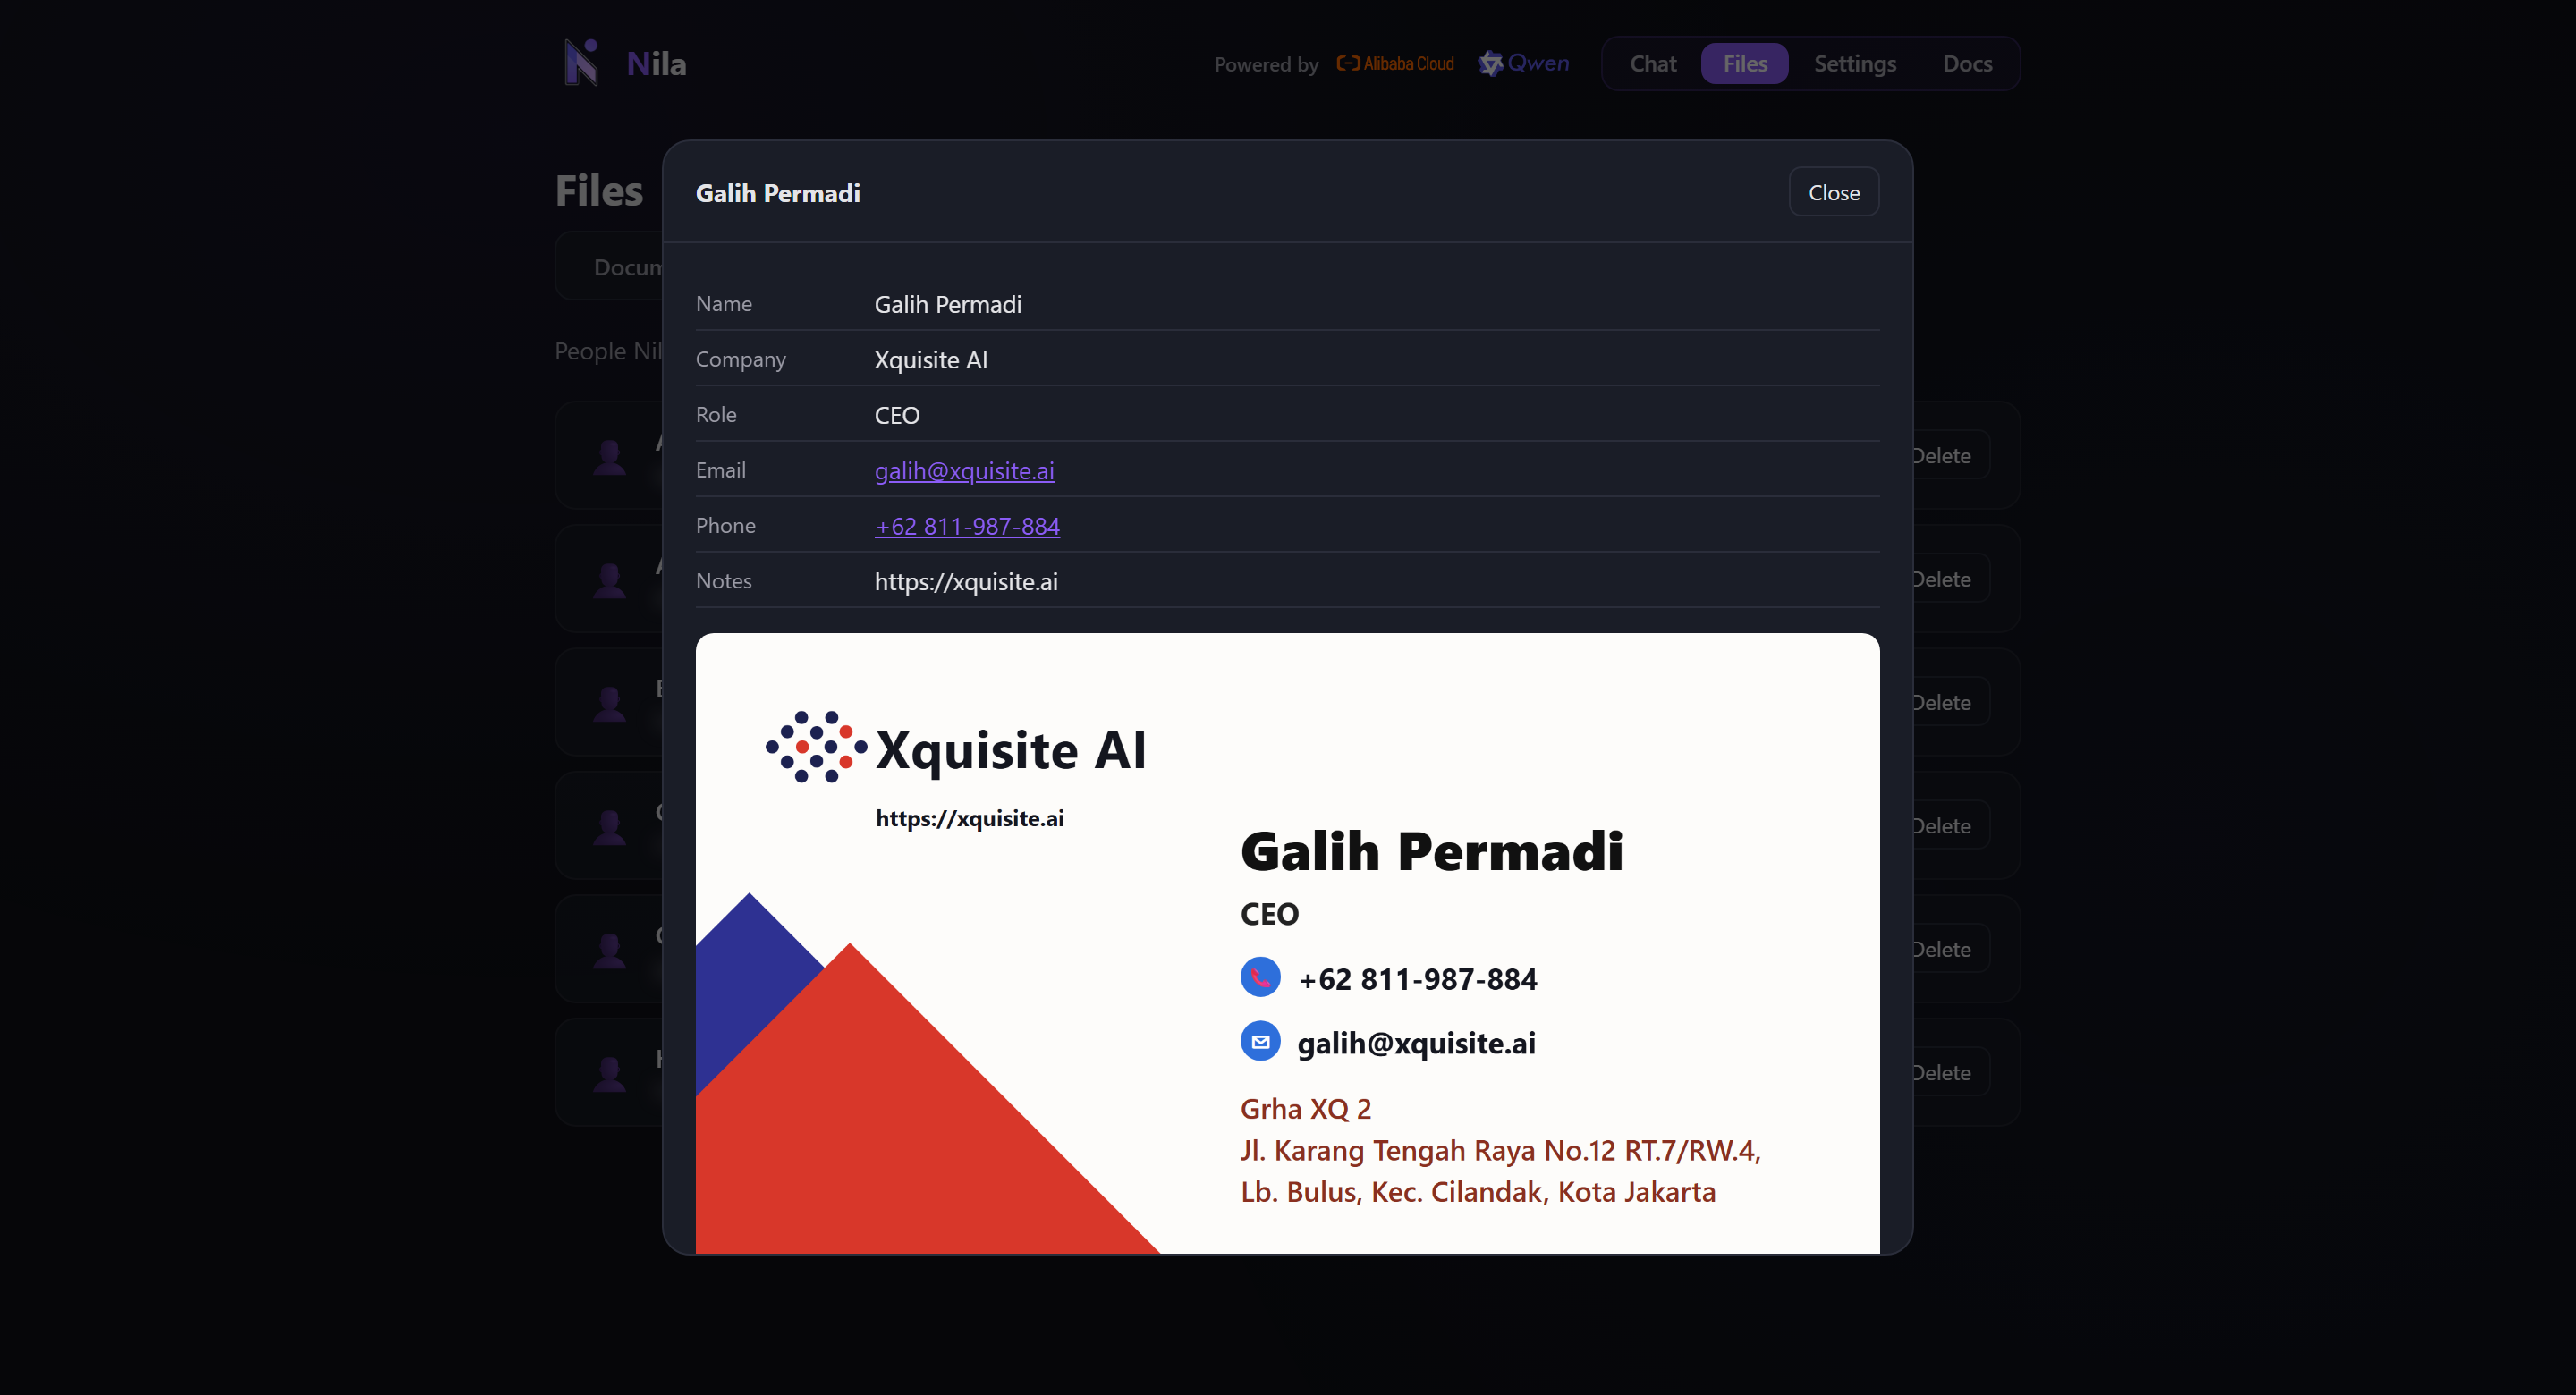
From pocket to filed, in one Telegram message
Business cards become a pocket CRM
⚙ Control — /control
The cockpit. Connect services, pick models, shape the personality, and watch the system run — the guides below all end here.
Connect Alibaba Cloud Model Studio
The AI engine is your assistant's brain — it powers chat and reasoning, document understanding, and image & video generation. Nila uses Alibaba Cloud Model Studio (an OpenAI-compatible API) with Qwen models for chat and Wan models for media. Set this up first; nothing else works without it.
Overview
One API key unlocks every AI capability. You then pick which model handles each job from the Control panel — and can swap them anytime.
Provider
compatible-mode endpoint, so the same key powers chat, image, and
video. In the Control panel this is the AI Engine
credential.Prerequisites
- An Alibaba Cloud account with Model Studio activated.
- The region you'll use — International (Singapore) or China (Beijing). Models and the endpoint URL differ per region.
- Access to either the server's
.envfile or the Control panel to store the key.
sk-)
and the base URL for your region.1 Get your Model Studio API key
- Sign in to the Alibaba Cloud Model Studio console (International). If it's your first time, activate Model Studio when prompted.
- Open API Keys (under your profile / "API-KEY" menu).
- Click Create API Key, then copy the value — it starts with
sk-and is shown once. - Note your region's base URL (OpenAI-compatible mode):
Region Base URL International (Singapore) https://dashscope-intl.aliyuncs.com/compatible-mode/v1China (Beijing) https://dashscope.aliyuncs.com/compatible-mode/v1
2 Add the key to Nila
As with the other connectors, the key lives in two places — the worker (for chat, media, and briefings) and n8n (for workflow AI calls).
Option A — Environment file (.env)
On the server, edit /home/g-os/nila/.env:
# --- AI Engine (Alibaba Cloud Model Studio, OpenAI-compatible) ---
DASHSCOPE_API_KEY=sk-your-model-studio-key
DASHSCOPE_BASE_URL=https://dashscope-intl.aliyuncs.com/compatible-mode/v1
DASHSCOPE_MODEL=qwen-plus   # default chat model (fallback)
Then restart the worker so it picks up the new variables:
cd /home/g-os/nila && docker compose up -d worker
Option B — Control panel
Open the Control panel, find AI Engine, and edit the credential. Paste the API key and the base URL for your region, then save.
DASHSCOPE_MODEL
is only the fallback chat model — the active models are chosen in the next step.3 Choose your models
In the Control panel → Choose your AI models, pick a model for each job from the dropdowns (the list is pulled live from your connected account), then Save Models. Changes apply instantly — no restart.
| Slot | What it does | Good picks |
|---|---|---|
| Chat model | The assistant's brain — every conversation, reasoning, and document task | qwen-max / qwen…-plus for best quality; qwen-turbo / qwen-flash for speed & lower cost |
| Image generation | Text-to-image (/imagine) | wan2.7-image-pro (best) · wan2.7-image (faster) · qwen-image-* |
| Video — T2V | Video from a text prompt | wan2.6-t2v |
| Video — I2V | Animate a still image into video | wan2.7-i2v |
| Vision OCR | Reads receipts & business cards from photos | qwen3-vl-plus · qwen-vl-max |
| Embeddings (RAG) | Document search vectors — ⚠️ changing this requires re-ingesting all documents | text-embedding-v4 |
| Voice transcription | Speech-to-text for voice notes | qwen3-asr-flash |
| TTS voice — Bahasa | Voice replies in Indonesian (Edge, free — Qwen TTS has no Indonesian voice) | Ardi (male) · Gadis (female) |
| TTS voice — English | Voice replies in English | Edge voices (free) · Cherry / Ethan / Jennifer / Ryan (Qwen3-TTS, billed) |
-plus/-max) unless cost
or latency is a concern. For images, -pro variants give the best
detail at higher cost; drop to the standard variant for quick drafts. Bigger
models cost more per call and are a touch slower — pick the smallest one that
still feels right.4 Verify the connection
- Open the Control panel — the model section should show "N models available" and populated dropdowns. That confirms the key and base URL work.
- Send a normal chat message (Telegram or Nila) and confirm you get an AI reply.
- Try
/imagine a sunrise over Jakartato confirm image generation.
Troubleshooting
| Symptom | Likely cause & fix |
|---|---|
| 0 models available / empty dropdowns | Wrong DASHSCOPE_API_KEY or DASHSCOPE_BASE_URL. Re-copy the key; make sure the base URL matches your region and ends in /compatible-mode/v1. |
401 / invalid api key | Key mistyped, deleted, or from a different region/account. Create a fresh key in the Model Studio console. |
model not found | The selected model isn't available in your region/account. Pick another from the dropdown and Save. |
403 / Arrearage or quota errors | The Alibaba Cloud account is out of credit or the model isn't activated. Top up / enable the model in the console. |
| Chat works, images don't (or vice-versa) | Only that model slot is misconfigured. Re-pick it in Choose your models and Save. |
docker compose logs -f worker — the provider's error message is
printed when a model call fails.Connect Telegram
Telegram is the primary way you talk to your assistant — chat in natural language, run commands, send voice notes and receipt photos, and receive briefings and alerts. This guide creates the bot and wires it up.
Overview
Once connected, you message a private Telegram bot and it routes your request through the assistant — fetching context, calling the AI, and replying right in the chat. What you can do:
/imagine a prompt to create an image/buy, /sell and moreSupported channels
Prerequisites
- A Telegram account (the phone app or desktop client).
- Access to either the server's
.envfile or the Control panel to store the bot token. - The assistant stack running, with n8n reachable at your domain (it hosts the bot's webhook).
1 Create a Telegram bot
- In Telegram, open a chat with @BotFather (the official bot for creating bots).
- Send
/newbot. - Give it a display name (e.g.
Nila Assistant). - Give it a username ending in
bot(e.g.nila_assistant_bot). It must be unique. - BotFather replies with a token like
123456789:AAH...xyz. Copy it.
/revoke to BotFather
to issue a new one./setdescription,
/setuserpic, and /setcommands to show a command menu
(e.g. imagine - Generate an image).2 Get your Telegram user ID
The bot is private — it should only answer you. Your numeric user ID is how it knows that.
- Open a chat with @userinfobot and send any message.
- It replies with your Id — a number like
123456789. Copy it.
YOUR_TELEGRAM_ID. The router only responds to
messages from this ID, so strangers who find the bot get ignored.3 Add the token to Nila
The same bot token is used in two places — the worker (for outbound messages like briefings and confirmations) and n8n (for receiving your messages).
Option A — Environment file (.env)
On the server, edit /home/g-os/nila/.env:
# --- Telegram Bots ---
PERSONAL_BOT_TOKEN=123456789:AAH...your-bot-token
YOUR_TELEGRAM_ID=123456789
Then restart the worker so it picks up the new variables:
cd /home/g-os/nila && docker compose up -d worker
Option B — Control panel
Open the Control panel, find Chat Interface → Telegram, and click to edit the credential. Paste the same bot token and save. This is the credential n8n uses to receive messages.
.env entry powers outbound features; the Control-panel/n8n
credential powers inbound routing.4 Activate the bot (register the webhook)
A Telegram bot delivers messages to one webhook URL. n8n registers
that webhook automatically when you activate the routing workflow — no manual
setWebhook call needed.
- Open n8n at https://nila.xqui.site and sign in.
- Open the Personal Bot Main Router workflow.
- Confirm the Telegram Trigger node uses the credential from Step 3.
- Toggle the workflow Active (top-right). n8n registers the webhook with Telegram on activation.
curl -s "https://api.telegram.org/bot<BOT_TOKEN>/getWebhookInfo"
url field should point at your domain's
/webhook/... path.5 Verify the connection
- Open your new bot in Telegram (search its
@username) and press Start. - Send "hi" — it should reply within a few seconds.
- Try "what can you do?" or
/imagine a sunset over Jakartato confirm the full pipeline works.
Commands & usage
You can just talk to the bot — it detects what you want. A few explicit slash commands are also available.
Slash commands
| Command | What it does |
|---|---|
/imagine <prompt> | Generate an image from a text prompt |
Just say it (natural language)
| You want to… | Try saying |
|---|---|
| Morning briefing | "good morning" · "update me" |
| Check calendar | "what's on my calendar today?" |
| Schedule something | "add a meeting with Budi tomorrow 2pm" |
| Check email | "any unread emails?" |
| Send email | "email Sarah the proposal update" |
| Find a contact | "who is the PM at BCA?" |
| Search documents | "find the Acme proposal" |
| Research a topic | "latest news on rupiah rates" |
| Set a reminder | "remind me to call the bank at 4pm" |
| Add a task | "add task: send the invoice to Acme" |
Troubleshooting
| Symptom | Likely cause & fix |
|---|---|
| Bot never replies | The router workflow isn't Active in n8n, or the Telegram credential is wrong. Re-check Step 4 and the credential token. |
| Replies stopped after a change | Another tool/poll grabbed the webhook. A bot allows only one webhook — re-activate the n8n workflow to reclaim it. Check getWebhookInfo. |
| Bot ignores you specifically | YOUR_TELEGRAM_ID doesn't match your account. Re-check via @userinfobot and update .env. |
| It reads but can't send | PERSONAL_BOT_TOKEN missing/incorrect in .env. Set it and docker compose up -d worker. |
401 Unauthorized from Telegram | Token is invalid or revoked. Get a fresh one from BotFather and update both places. |
docker compose logs -f worker on
the server, and the workflow's Executions tab in n8n for inbound
messages.Connect Microsoft 365
Connect Microsoft 365 so your assistant can read and send email and read, create, and update calendar events. It uses the Microsoft Graph API with an app-only (client-credentials) connection — no per-user browser login required.
Overview
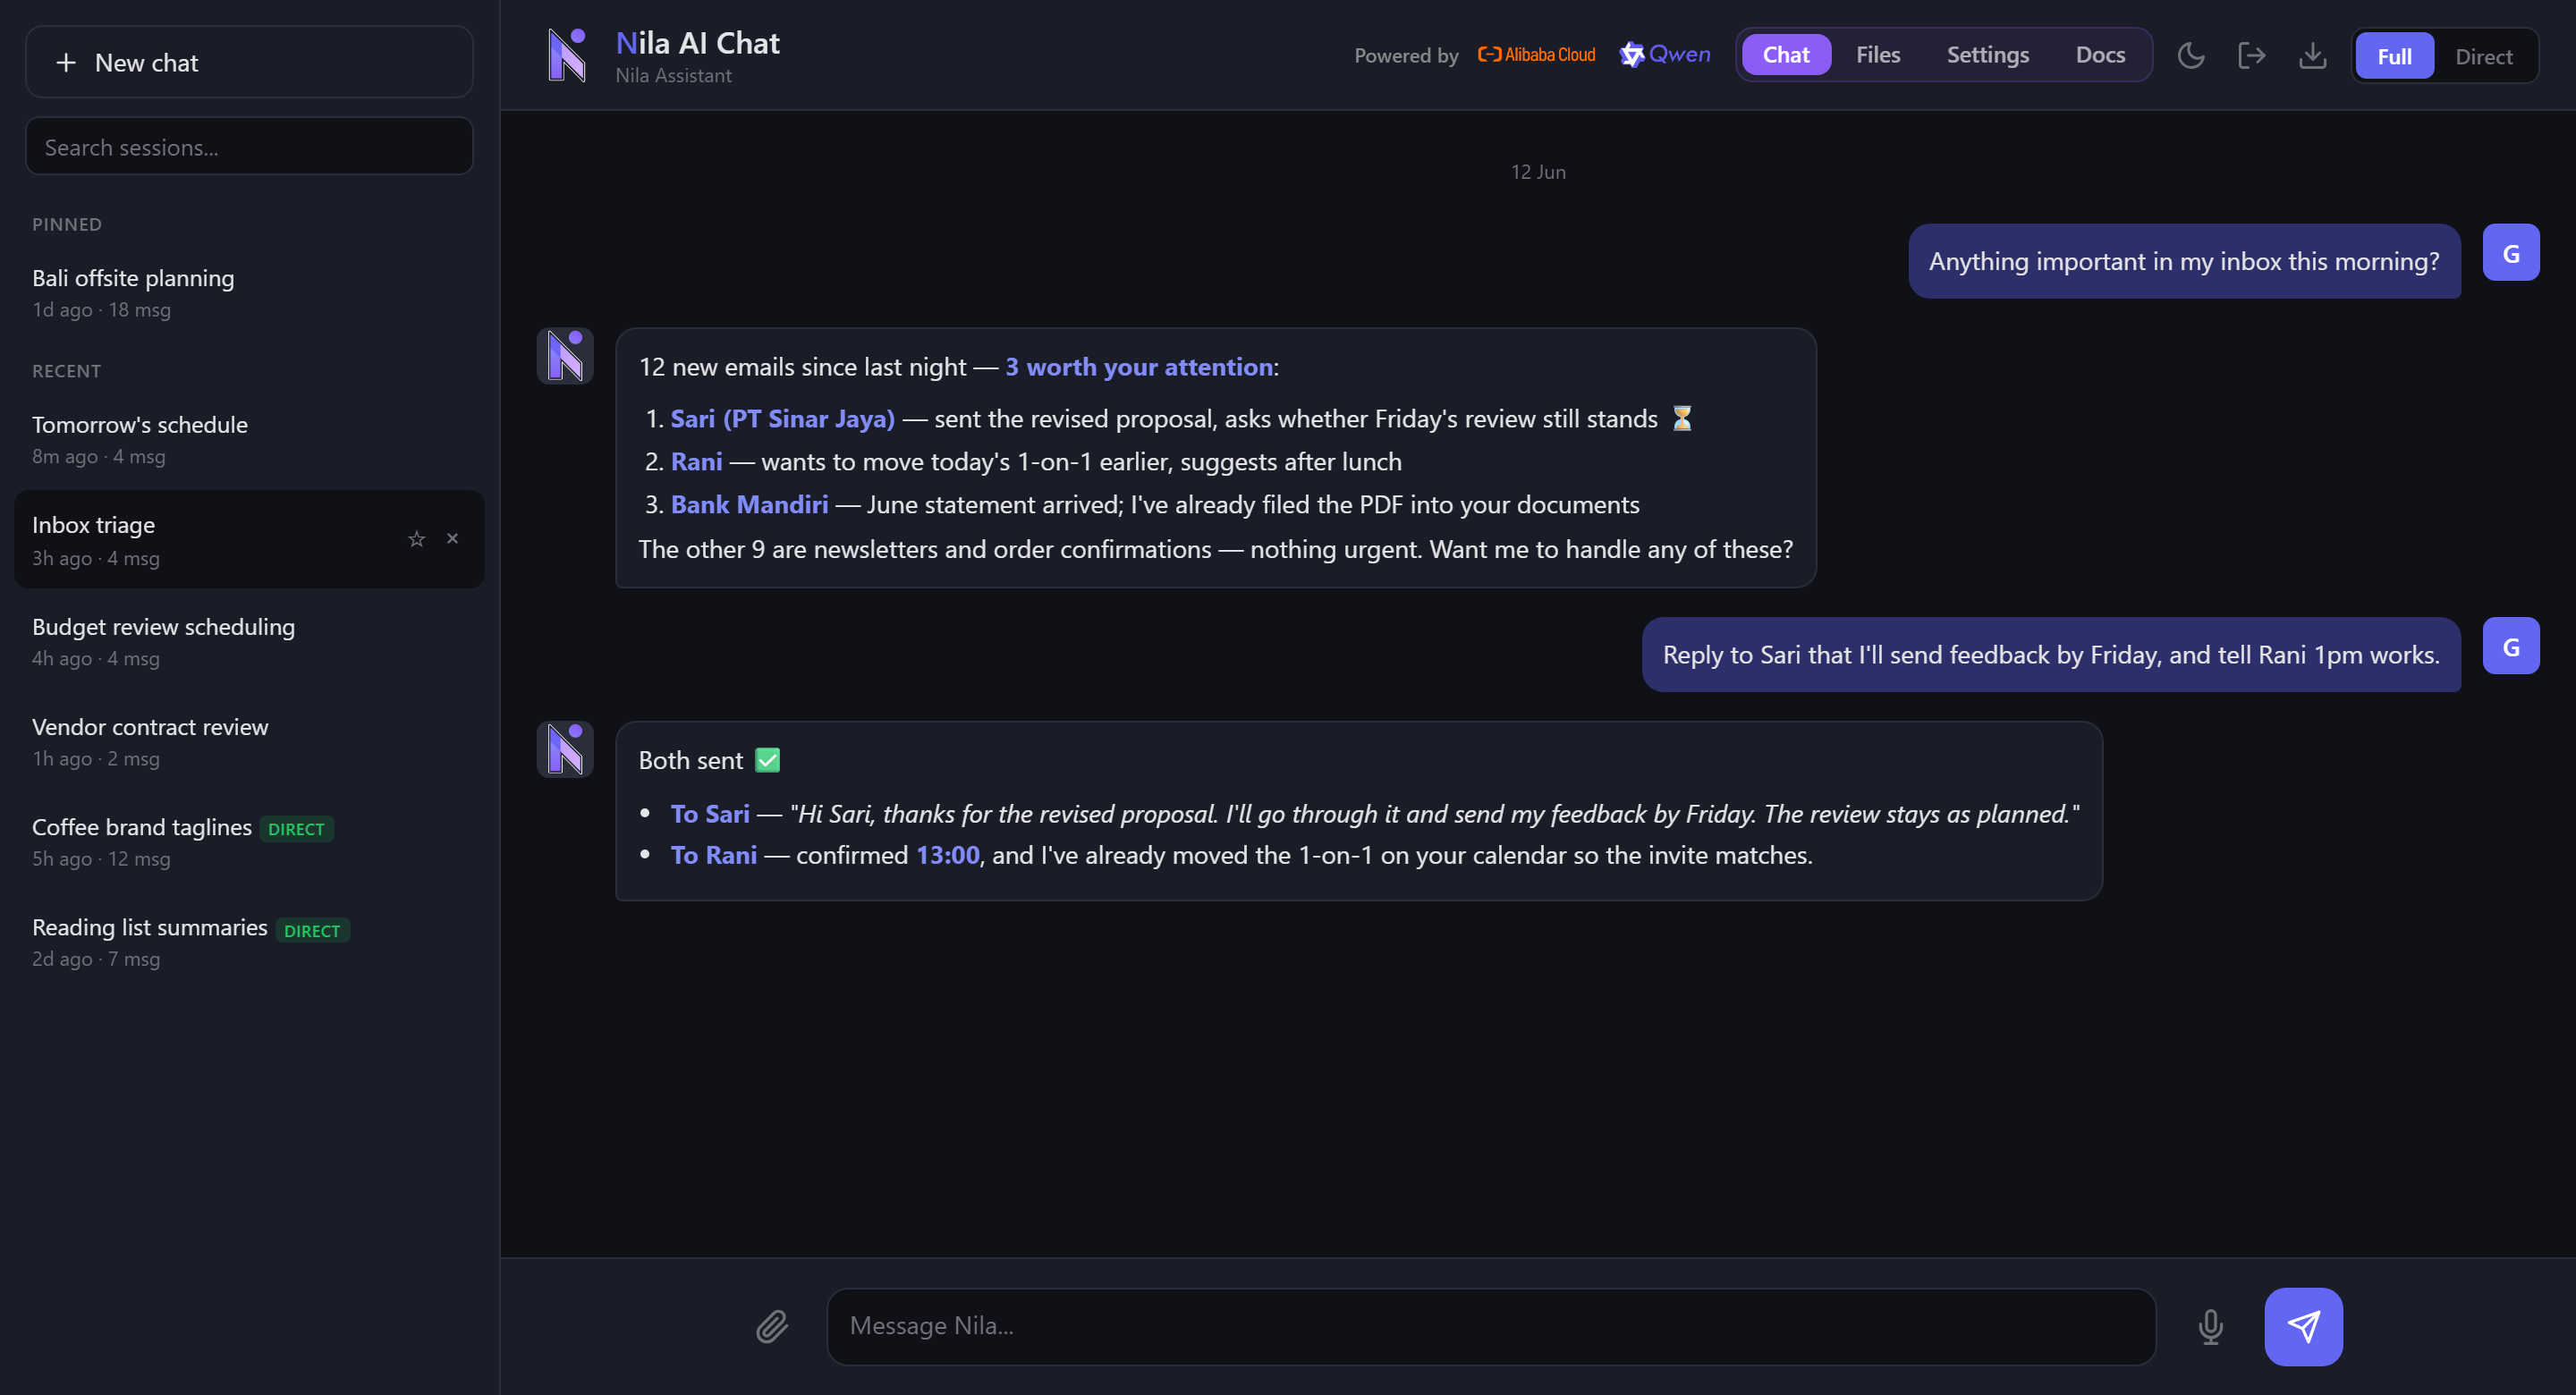
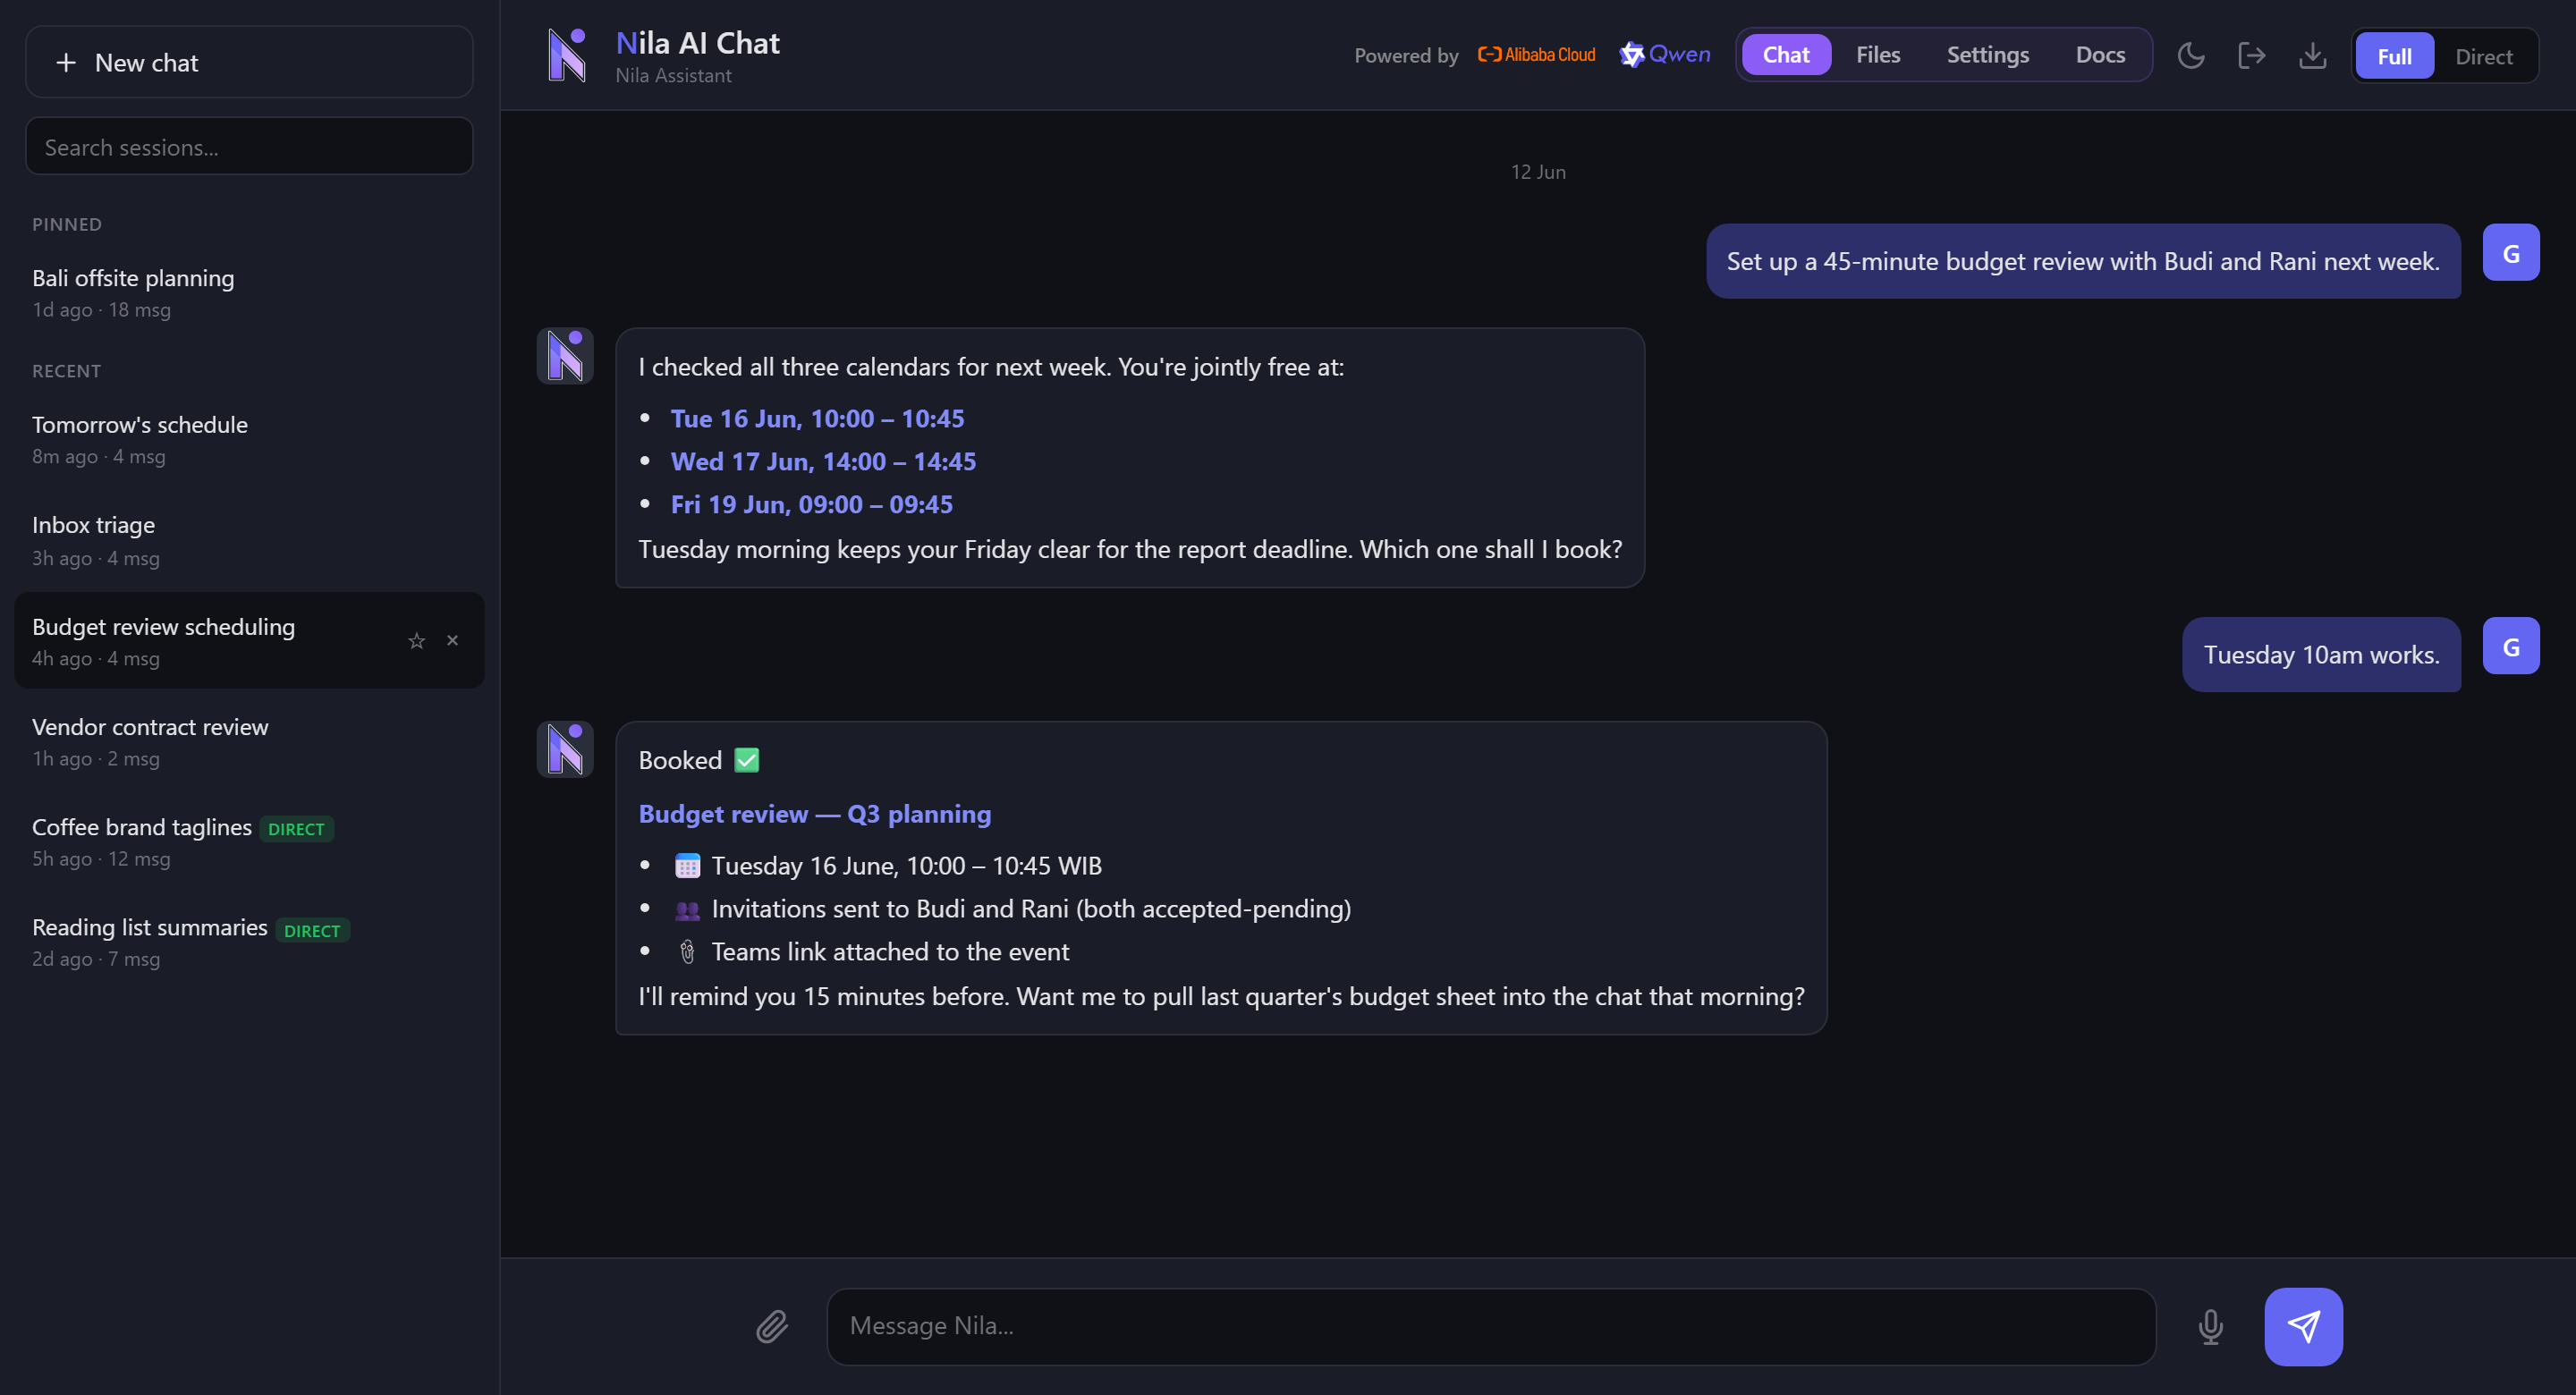
Once connected, the assistant talks to your mailbox and calendar across Telegram, the Nila chat UI, and scheduled workflows (such as the morning briefing). Here is what the connection enables:
What it looks like in chat
Supported providers
Prerequisites
- A Microsoft 365 / Entra ID (Azure AD) tenant.
- Global Administrator (or Privileged Role Admin + Cloud App Admin) rights — application permissions require admin consent.
- The mailbox address the assistant should act on, e.g.
galih@yourdomain.com. - Access to either the server's
.envfile or the Control panel to store credentials.
1 Register an app in Azure
- Go to the Microsoft Entra admin center (or Azure portal) and sign in as an administrator.
- Open Identity → Applications → App registrations and click New registration.
- Name it something recognizable, e.g.
Nila Assistant. - Under Supported account types, choose Accounts in this organizational directory only (single tenant).
- Leave Redirect URI empty — this is an app-only connection, no browser sign-in. Click Register.
- On the app's Overview page, copy the Application (client) ID and the Directory (tenant) ID.
• Directory (tenant) ID → becomes
MS_TENANT_ID
• Application (client) ID → becomes
MS_CLIENT_ID2 Grant API permissions
The connection uses Application permissions (app-only), not Delegated. This lets background workflows run without a signed-in user.
- In your app, open API permissions → Add a permission.
- Choose Microsoft Graph → Application permissions.
- Add each of the permissions in the table below.
- Back on the API permissions page, click Grant admin consent for <your tenant> and confirm. Each row should show a green Granted state.
| Permission | Type | Enables |
|---|---|---|
Calendars.ReadWrite | Application | Read, create, update, delete calendar events |
Mail.Read | Application | Read inbox, unread, and search messages |
Mail.Send | Application | Send new emails and replies |
403 Forbidden.3 Create a client secret
- In your app, open Certificates & secrets → Client secrets → New client secret.
- Give it a description (e.g.
nila-prod) and choose an expiry (24 months is typical). - Click Add, then immediately copy the secret's Value (not the Secret ID).
MS_CLIENT_SECRET. Also
note the expiry date and rotate before it lapses, or email/calendar will
silently stop working.4 Collect your four values
You should now have everything the assistant needs:
| Value | From | Variable |
|---|---|---|
| Directory (tenant) ID | App → Overview | MS_TENANT_ID |
| Application (client) ID | App → Overview | MS_CLIENT_ID |
| Client secret value | Certificates & secrets | MS_CLIENT_SECRET |
| Mailbox address | You choose | MS_USER_EMAIL |
5 Add the credentials to Nila
There are two places these values live. Use whichever matches how the feature is driven.
Option A — Environment file (.env)
Powers the Python worker integrations (Telegram bot, Nila chat, briefings).
On the server, edit /home/g-os/nila/.env:
# --- Microsoft 365 (Graph API) ---
MS_TENANT_ID=your-directory-tenant-id
MS_CLIENT_ID=your-application-client-id
MS_CLIENT_SECRET=your-client-secret-value
MS_USER_EMAIL=galih@yourdomain.com
Then restart the worker so it picks up the new variables:
cd /home/g-os/nila && docker compose up -d worker
Option B — Control panel
For n8n-driven workflows, open the Control panel, find Email & Calendar → Microsoft 365, and click to edit the credential. Paste the same Tenant ID, Client ID, and Client secret, then save.
6 Verify the connection
Confirm the credentials work end-to-end with two quick checks.
From the assistant (easiest)
- Message the bot: "What's on my calendar today?" — it should list today's events.
- Message the bot: "Any unread emails?" — it should return recent unread mail.
From the server (direct API)
# today's calendar events
curl -s https://nila.xqui.site/api/calendar/today

# unread email
curl -s https://nila.xqui.site/api/mail/unread
[]) means the connection is working.
An error body usually means a credential or permission problem — see
Troubleshooting below.Permissions reference
Exactly which Graph permission each capability relies on:
| Capability | Graph permission |
|---|---|
| View calendar (today / date) | Calendars.ReadWrite |
| Create / update / cancel events | Calendars.ReadWrite |
| Read inbox / unread / search | Mail.Read |
| Send email & reply to threads | Mail.Send |
Troubleshooting
| Symptom | Likely cause & fix |
|---|---|
Failed to acquire token | Wrong MS_TENANT_ID, MS_CLIENT_ID, or an expired/incorrect MS_CLIENT_SECRET. Re-copy from Azure; create a fresh secret if unsure. |
401 Unauthorized | Client secret expired or mistyped (you may have copied the Secret ID instead of the Value). Generate a new secret. |
403 Forbidden / Access denied | Admin consent not granted, or the required permission is missing. Re-check Step 2 and click Grant admin consent. |
404 / mailbox not found | MS_USER_EMAIL is wrong, or that mailbox isn't licensed for Exchange Online. |
| Worked before, now silent | The client secret expired. Create a new one and update .env / Control panel. |
| Wrong event times | The system stores/displays in WIB (Asia/Jakarta, UTC+7). Confirm the source event's timezone. |
docker compose logs -f worker — the Microsoft error description is
printed verbatim when a token request fails.